Migrate to the new Collaborator Portal
This step-by-step guide supports organizations moving from the legacy portal to the Salesforce Experience Cloud Collaborator Portal in Scientific Publications Cloud. It covers how to set up Experience Builder, configure the site’s password page, and configure correct Apex access for guest users so that login and password reset work smoothly from start to finish.
Implementation checklist
Follow the steps given below:
1. Set up the home page (Experience Builder)
-
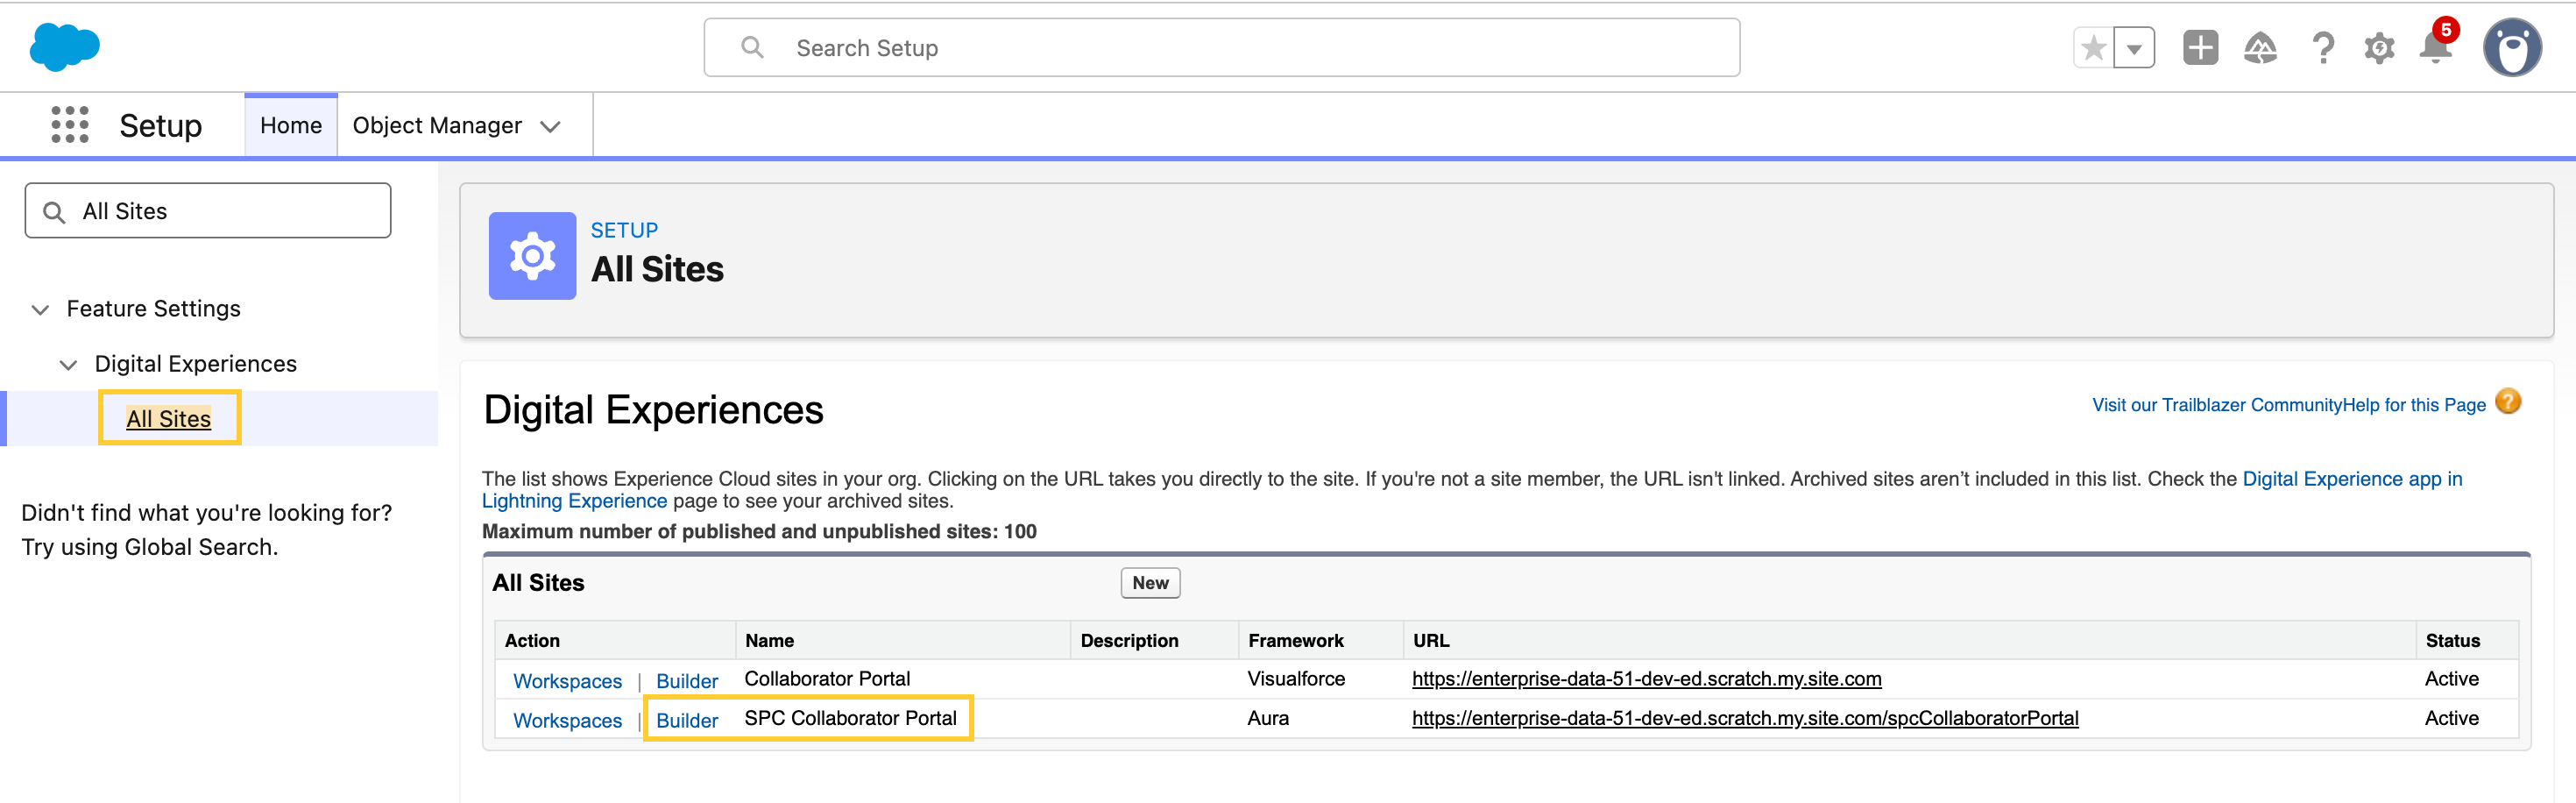
In Setup → All Sites, open the Builder for the SPC Collaborator Portal.
-
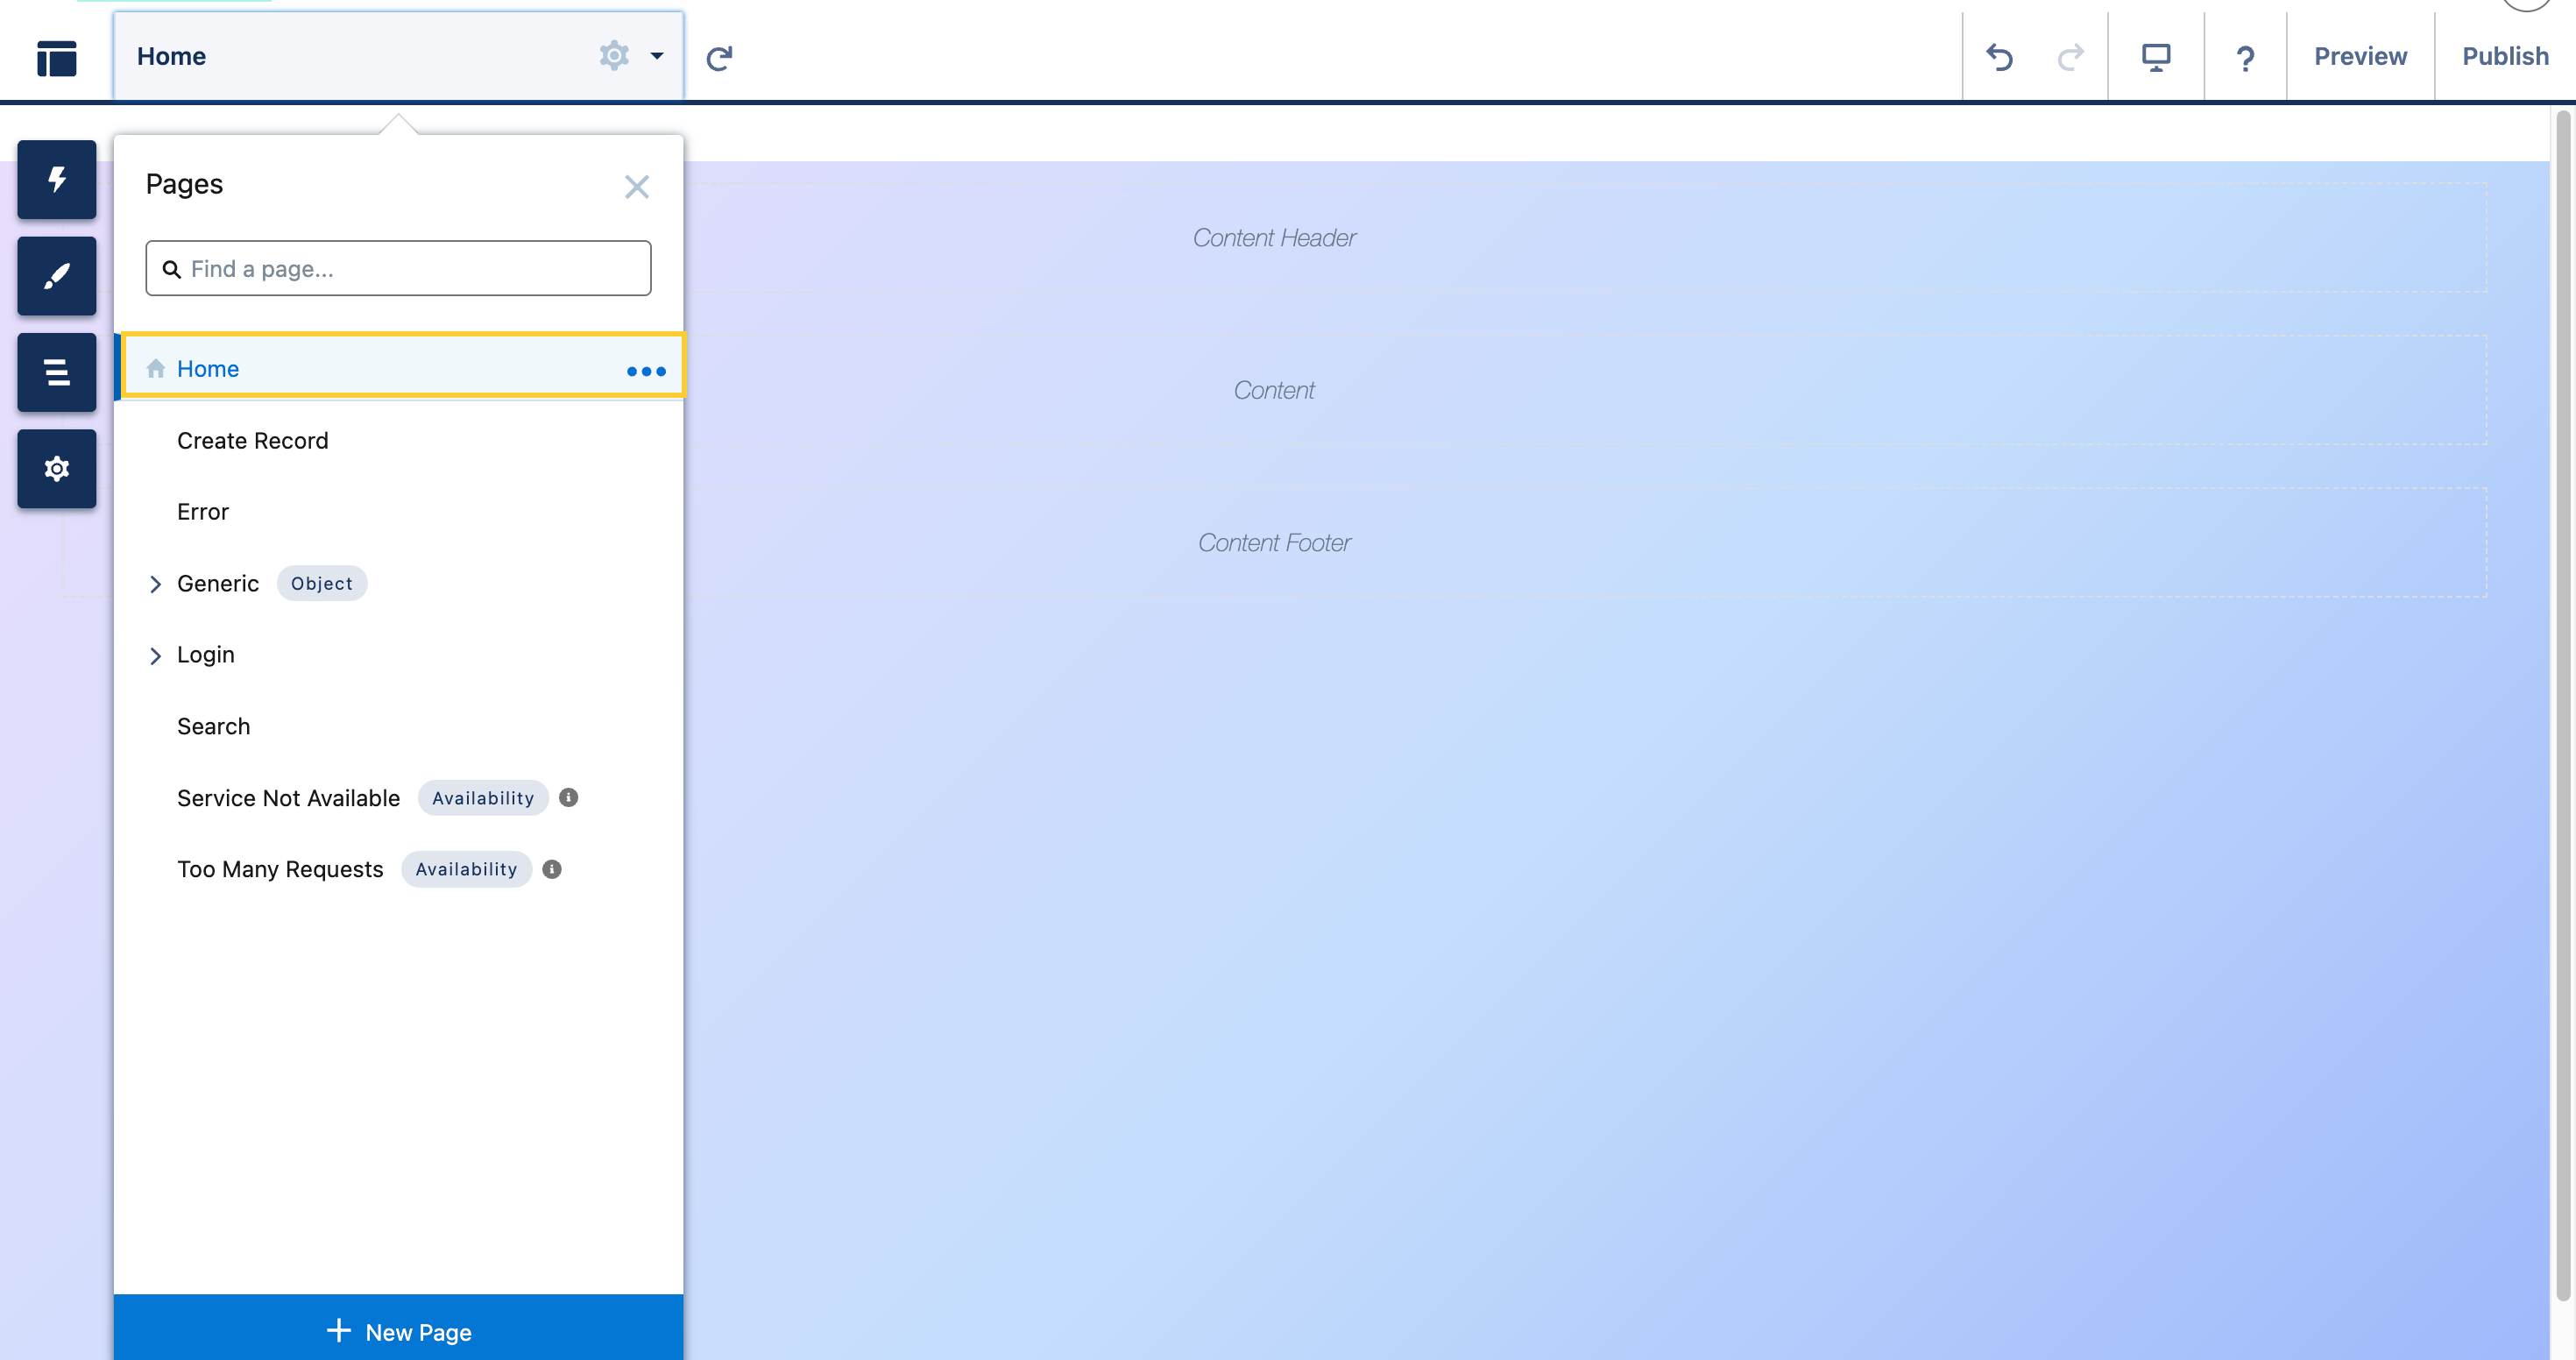
In Experience Builder, open the Home page.
2. Publish the site
- In Experience Builder, Publish the experience.
 This makes sure that administration changes and login settings apply to the live site.
3. Set the Change Password page (Site Details)
-
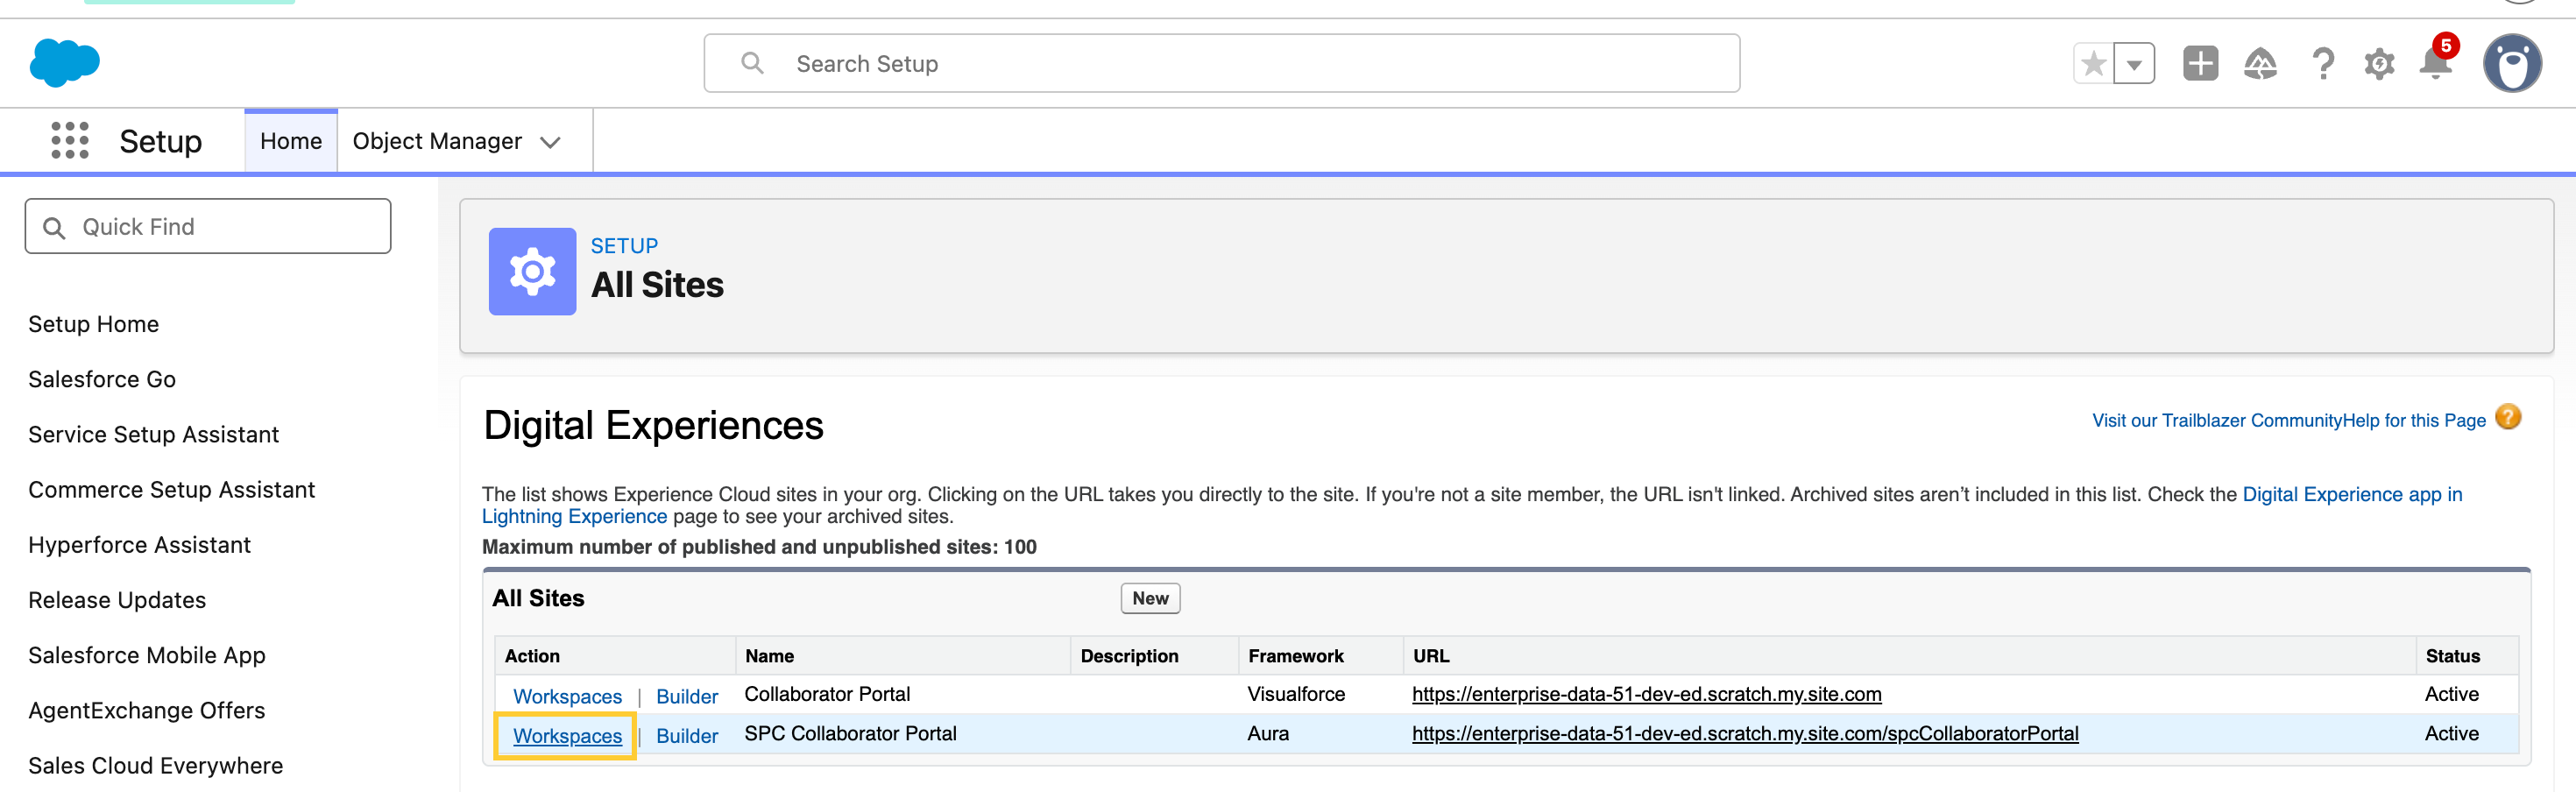
In Setup, → All Sites, open Workspaces for the SPC Collaborator Portal.
-
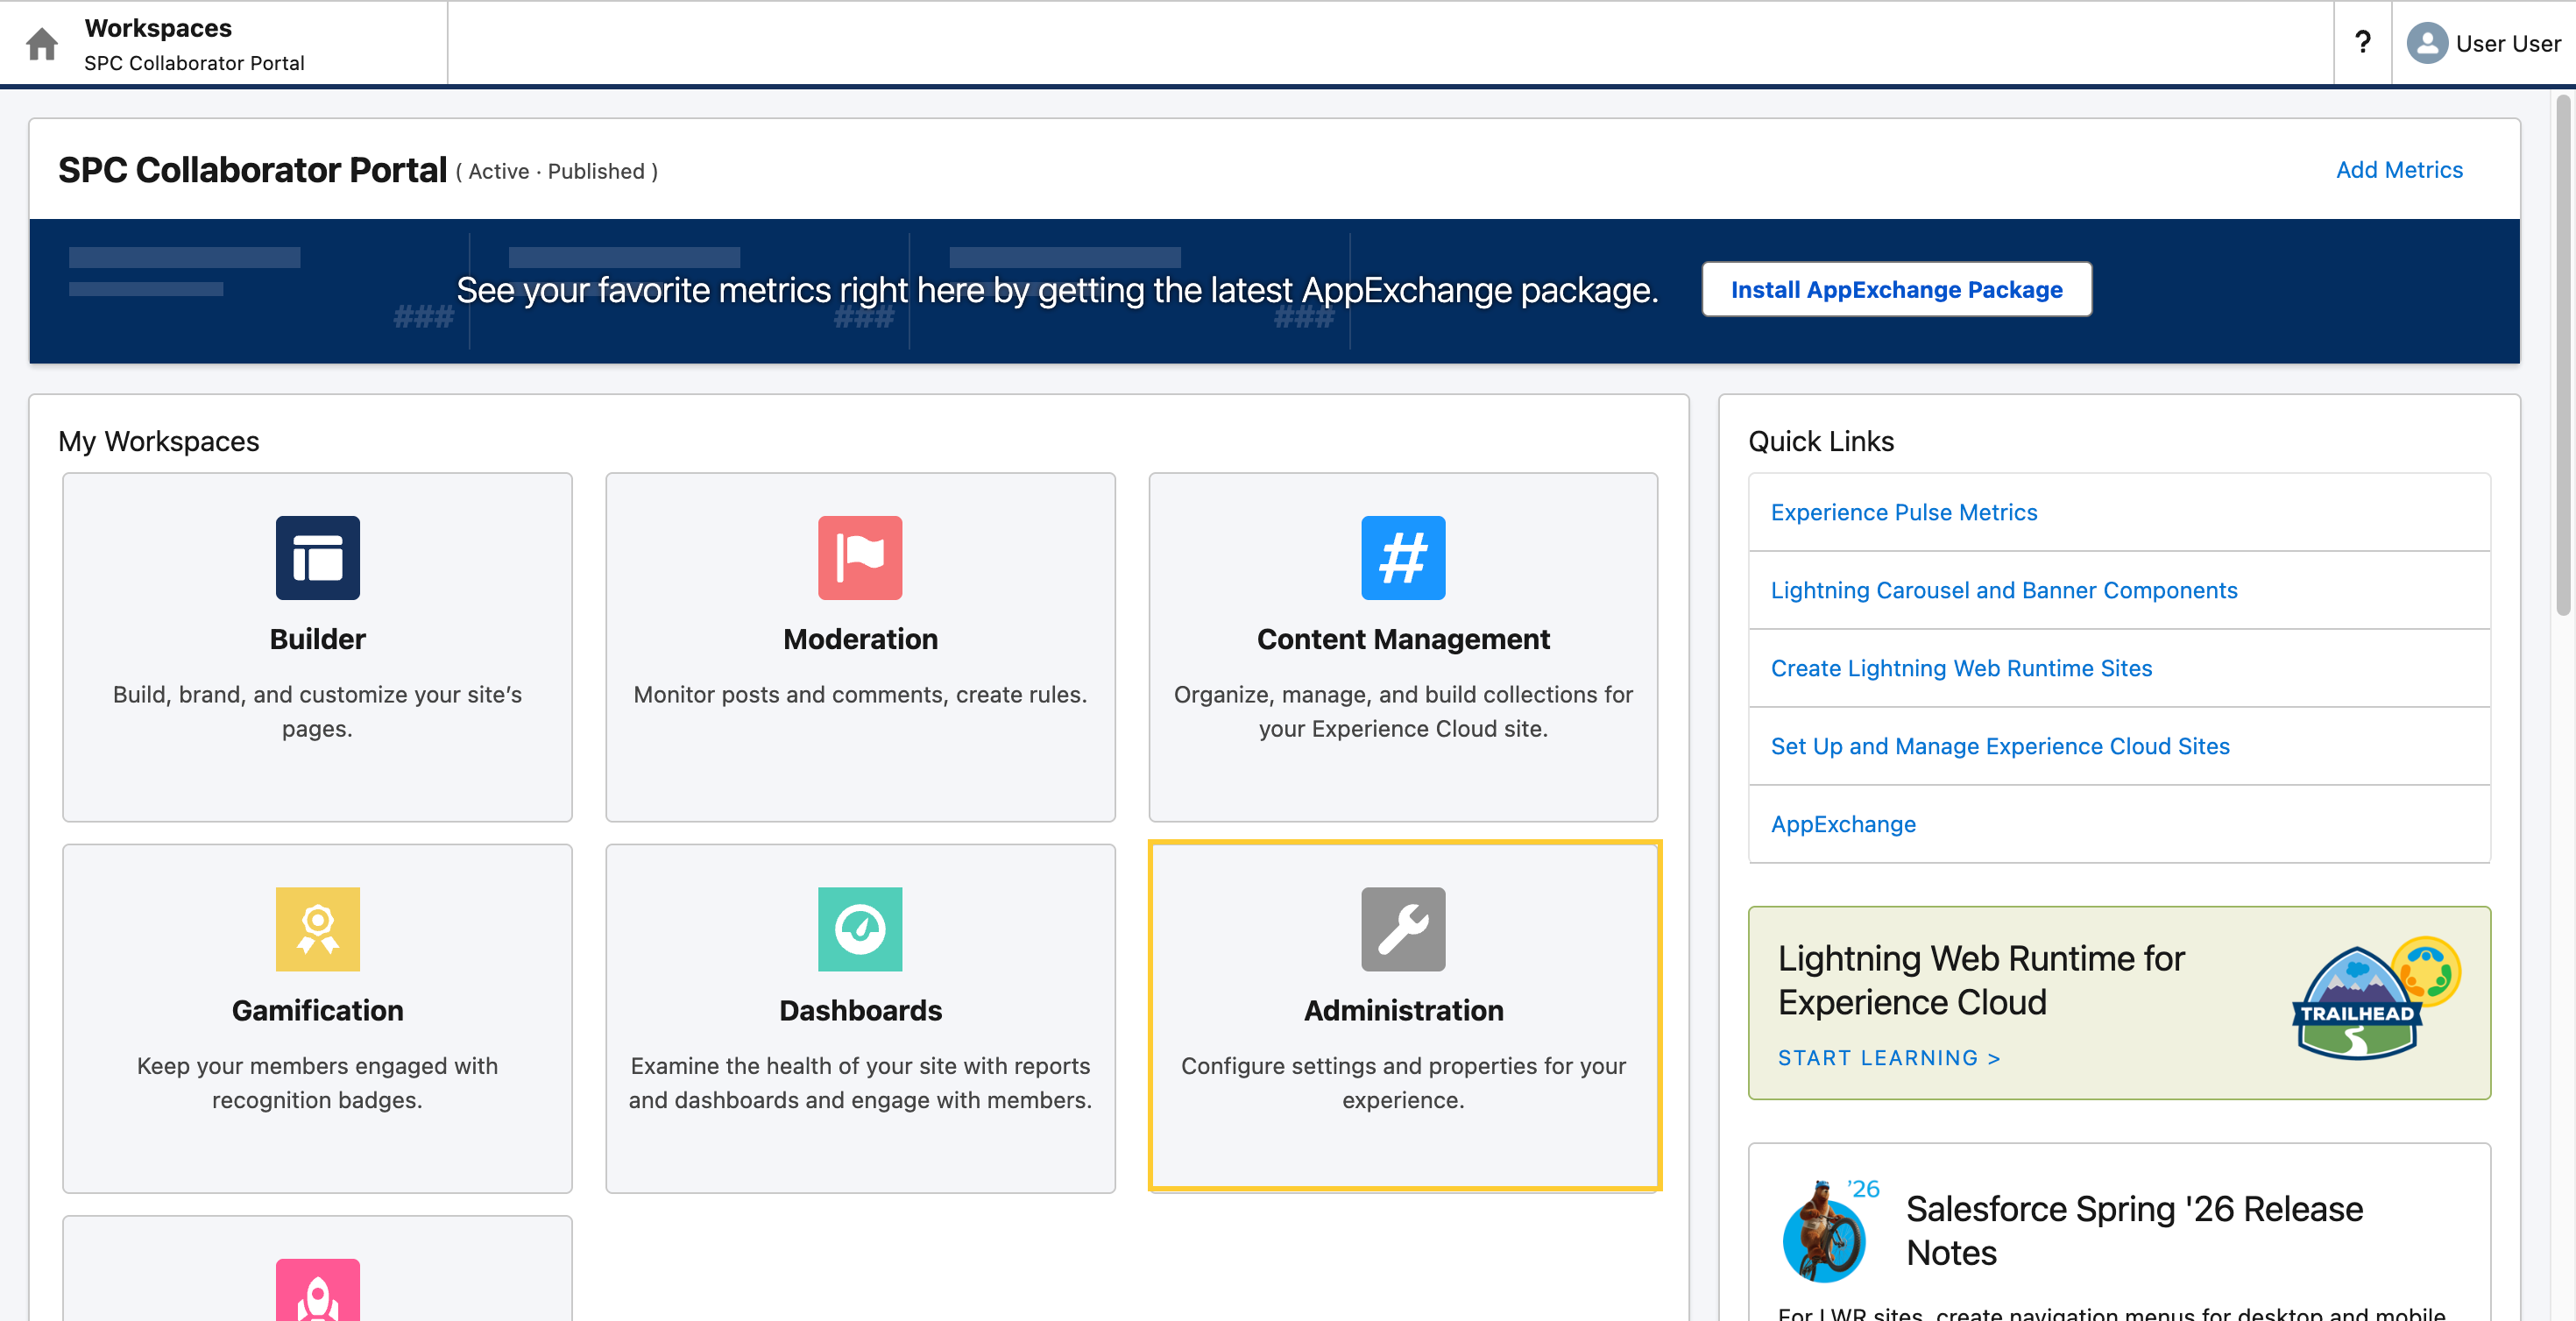
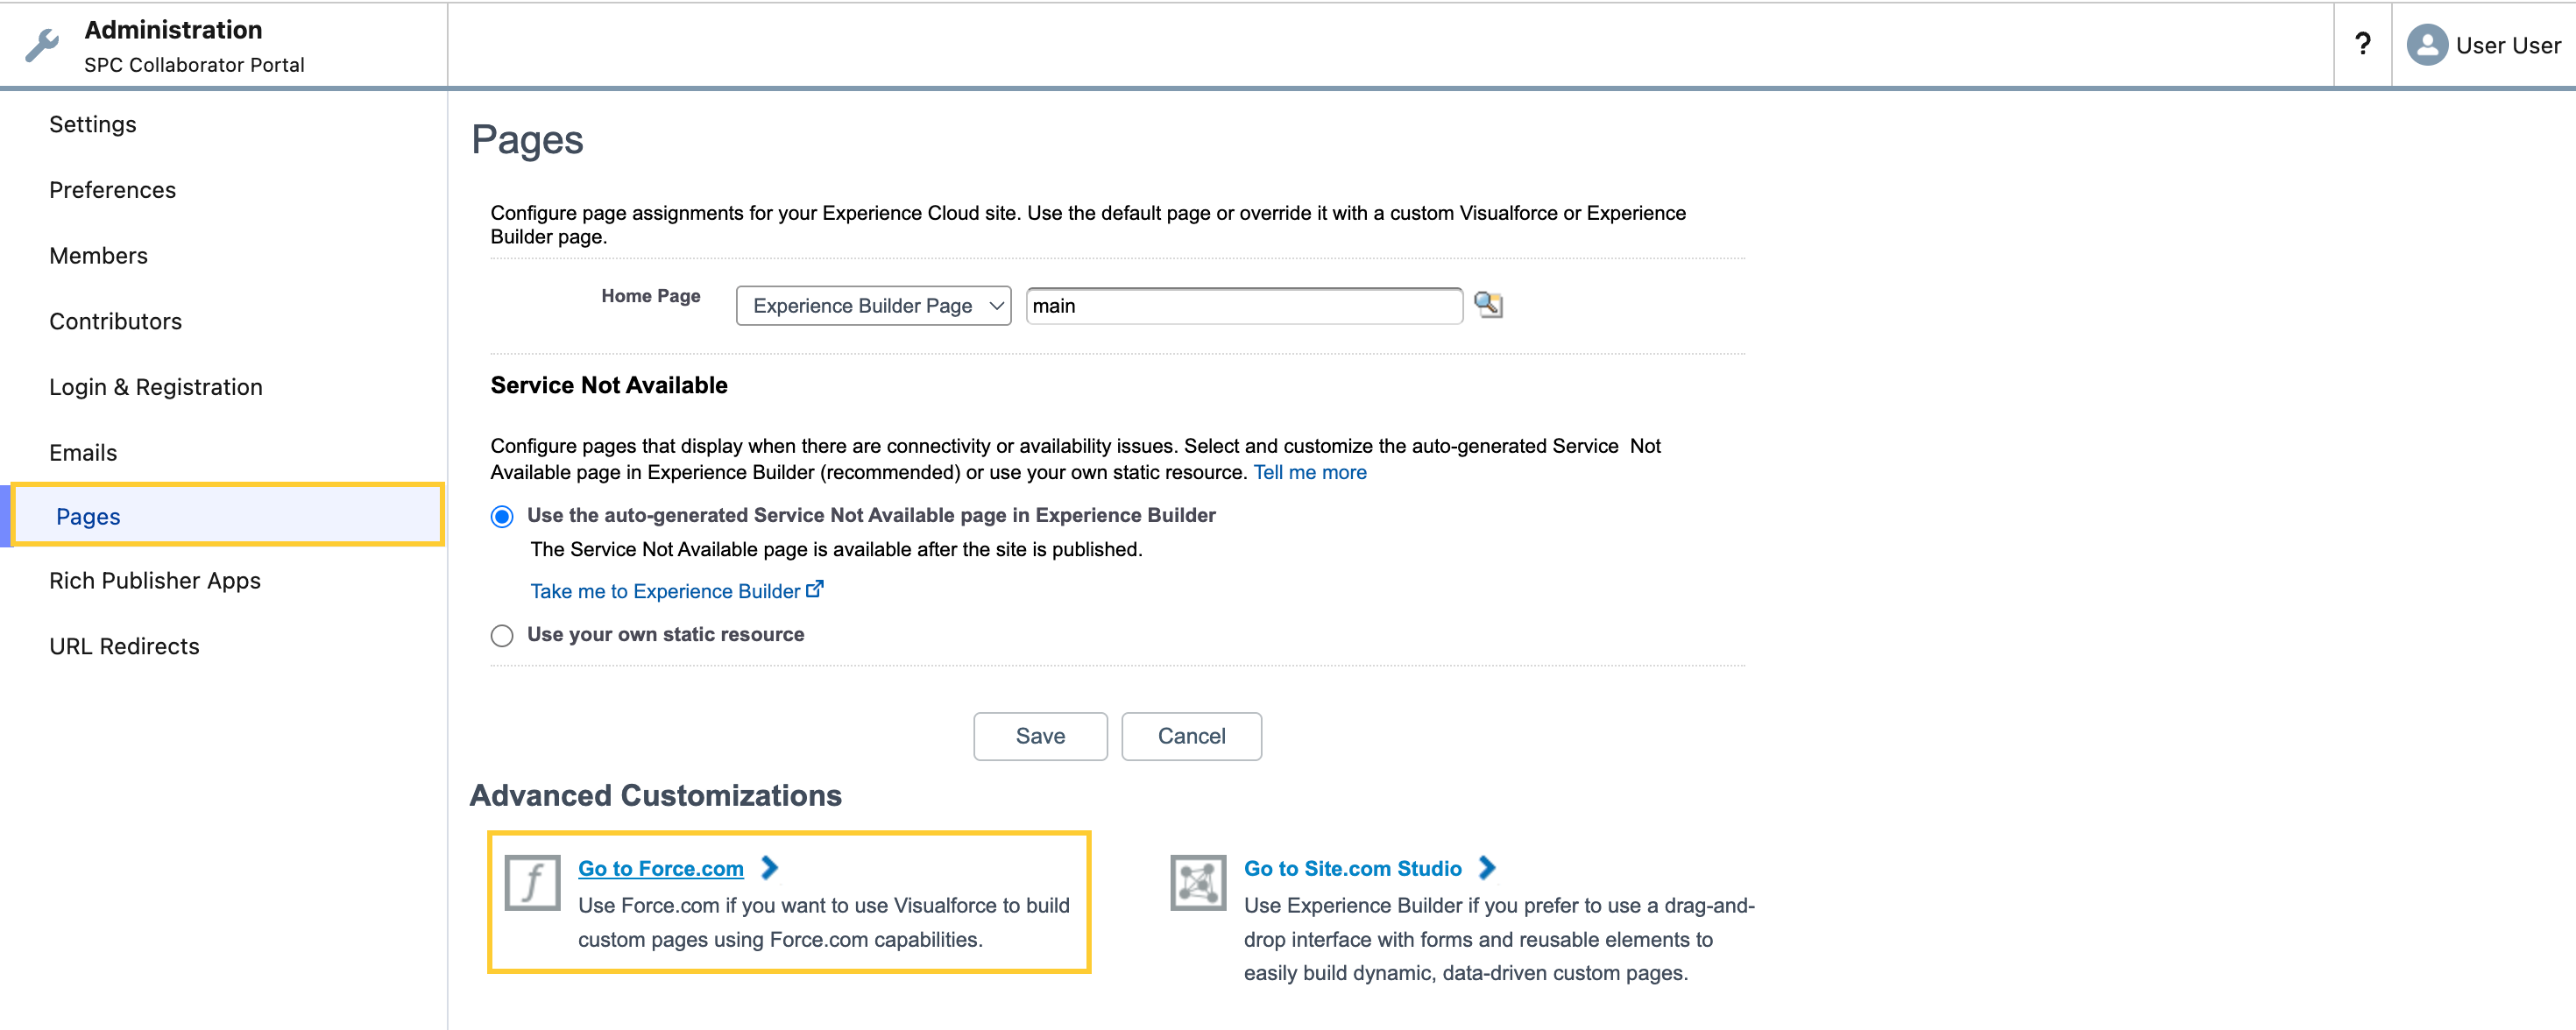
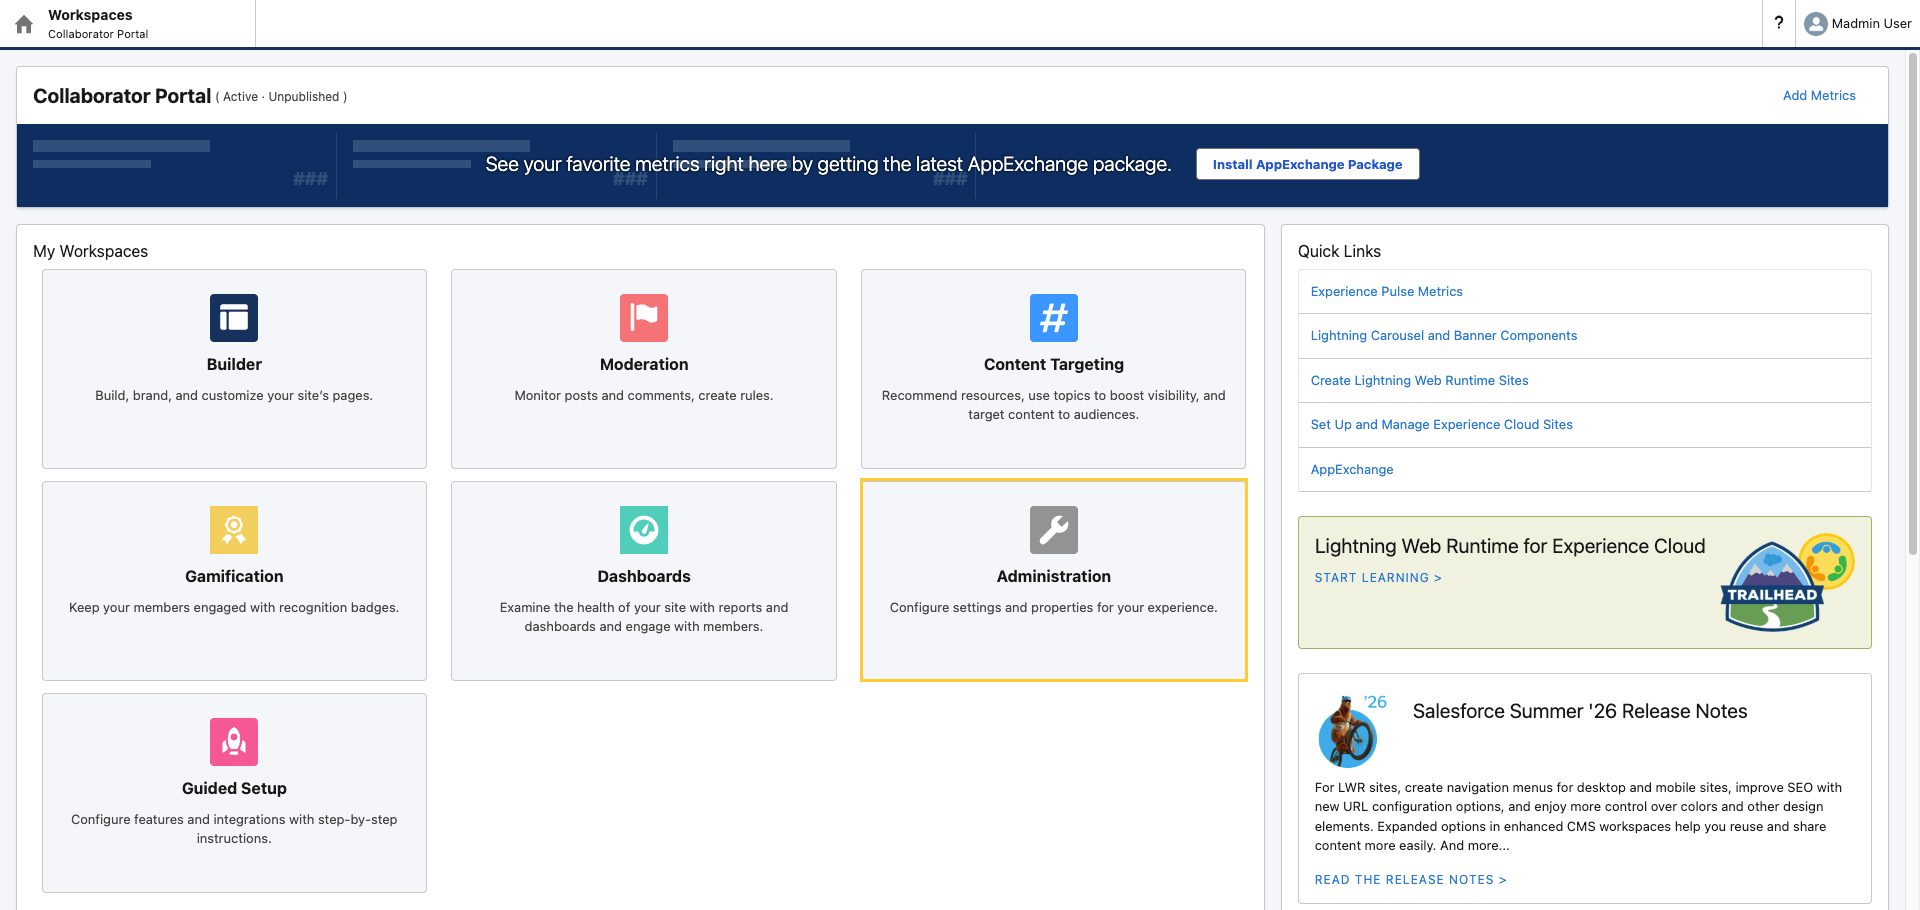
Open Administration.
-
Navigate to Pages → Advanced Customization and click Go to Force.com to open Site Details for the site behind the experience.
-
Click Edit.
-
In the Change Password Page, select
PP_SetPassword(or the namespaced equivalentmvn.PP_SetPassword, if your org uses a managed package namespace).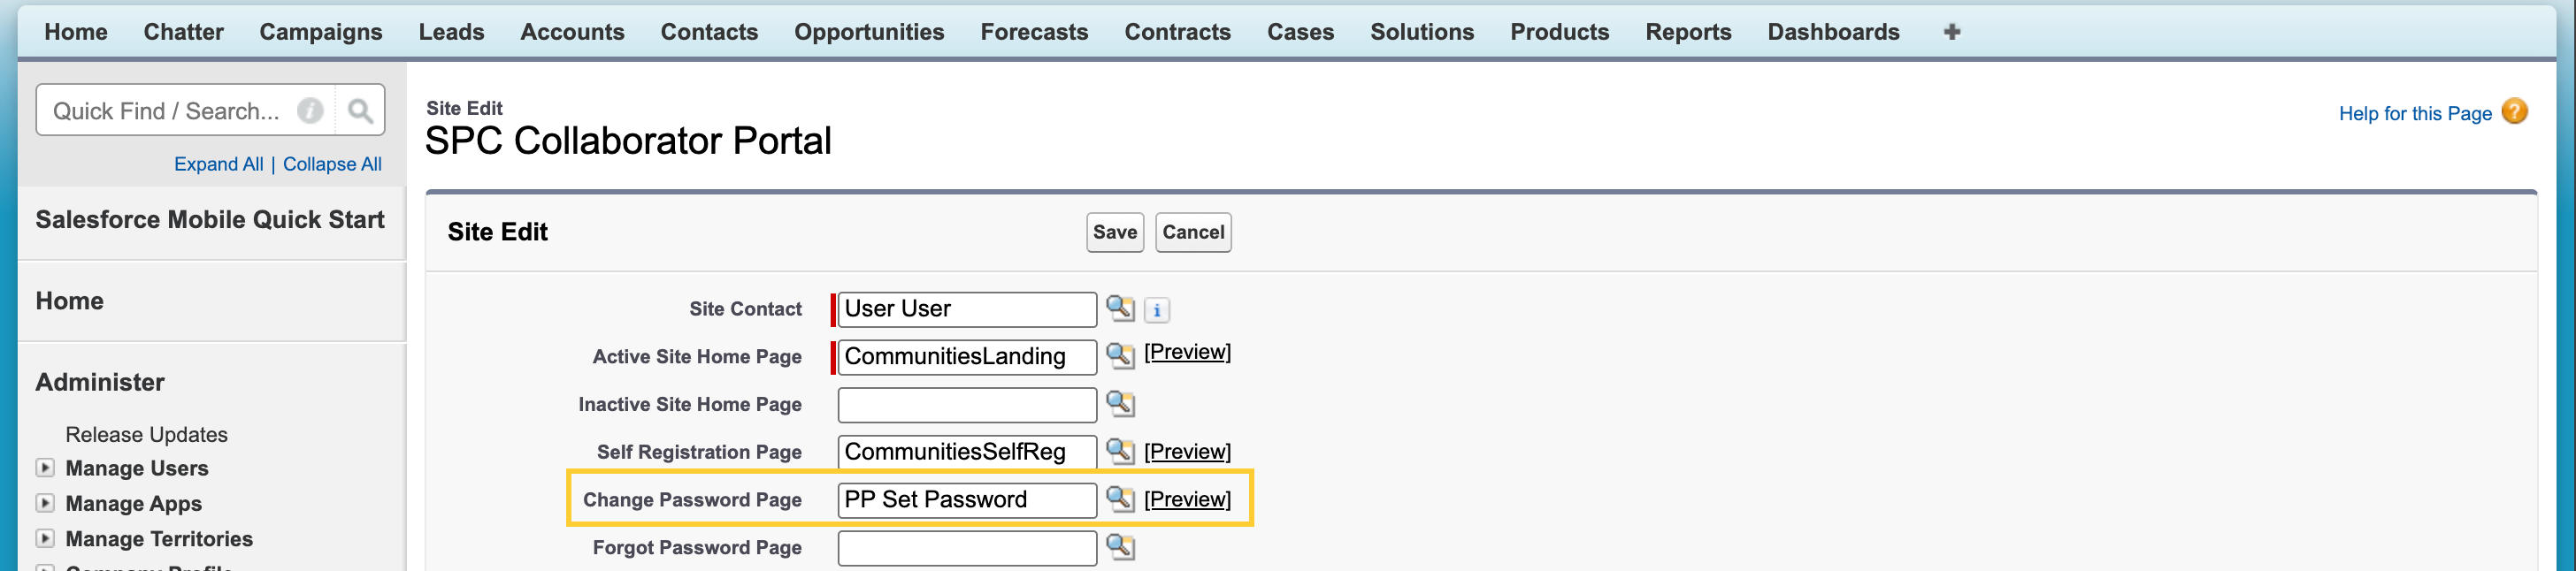
-
Save.
4. Enable Visualforce page access for the site
-
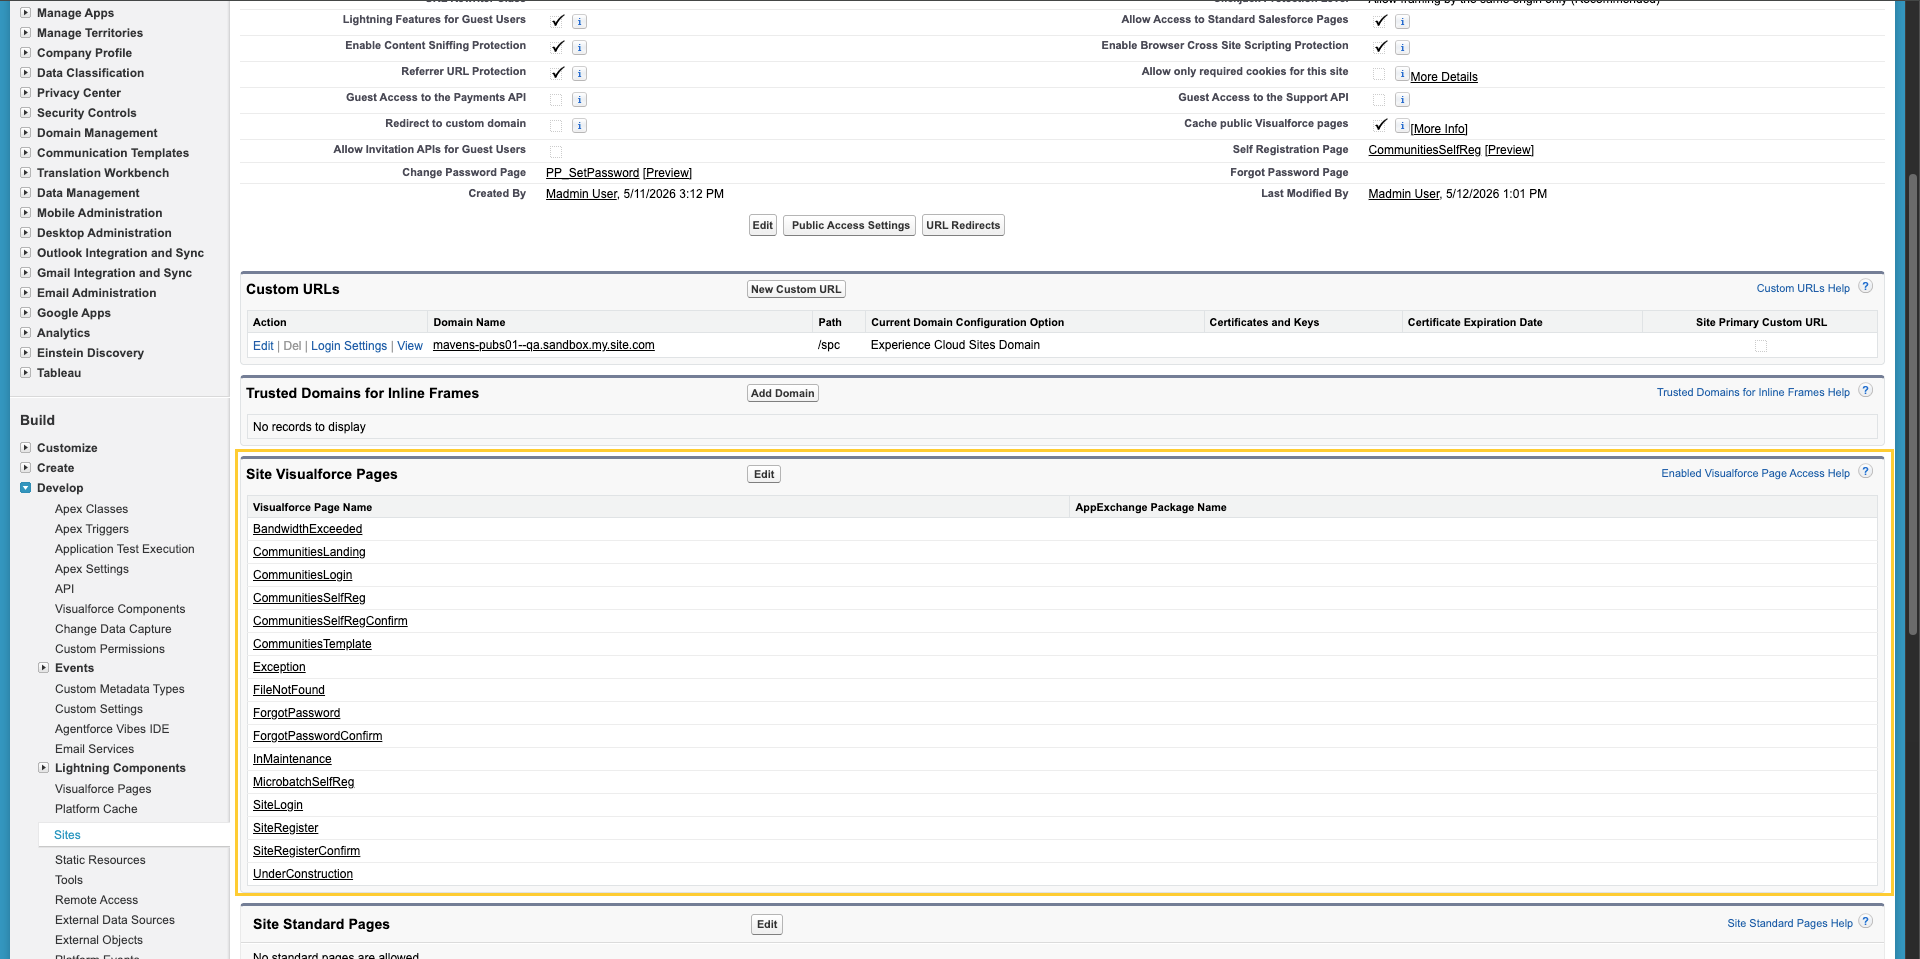
Still under Site Details for the SPC Collaborator Portal, navigate to Enable Visualforce Page Access (or Site Visualforce Pages, depending on UI labels).
-
Click Edit and add
PP_SetPassword.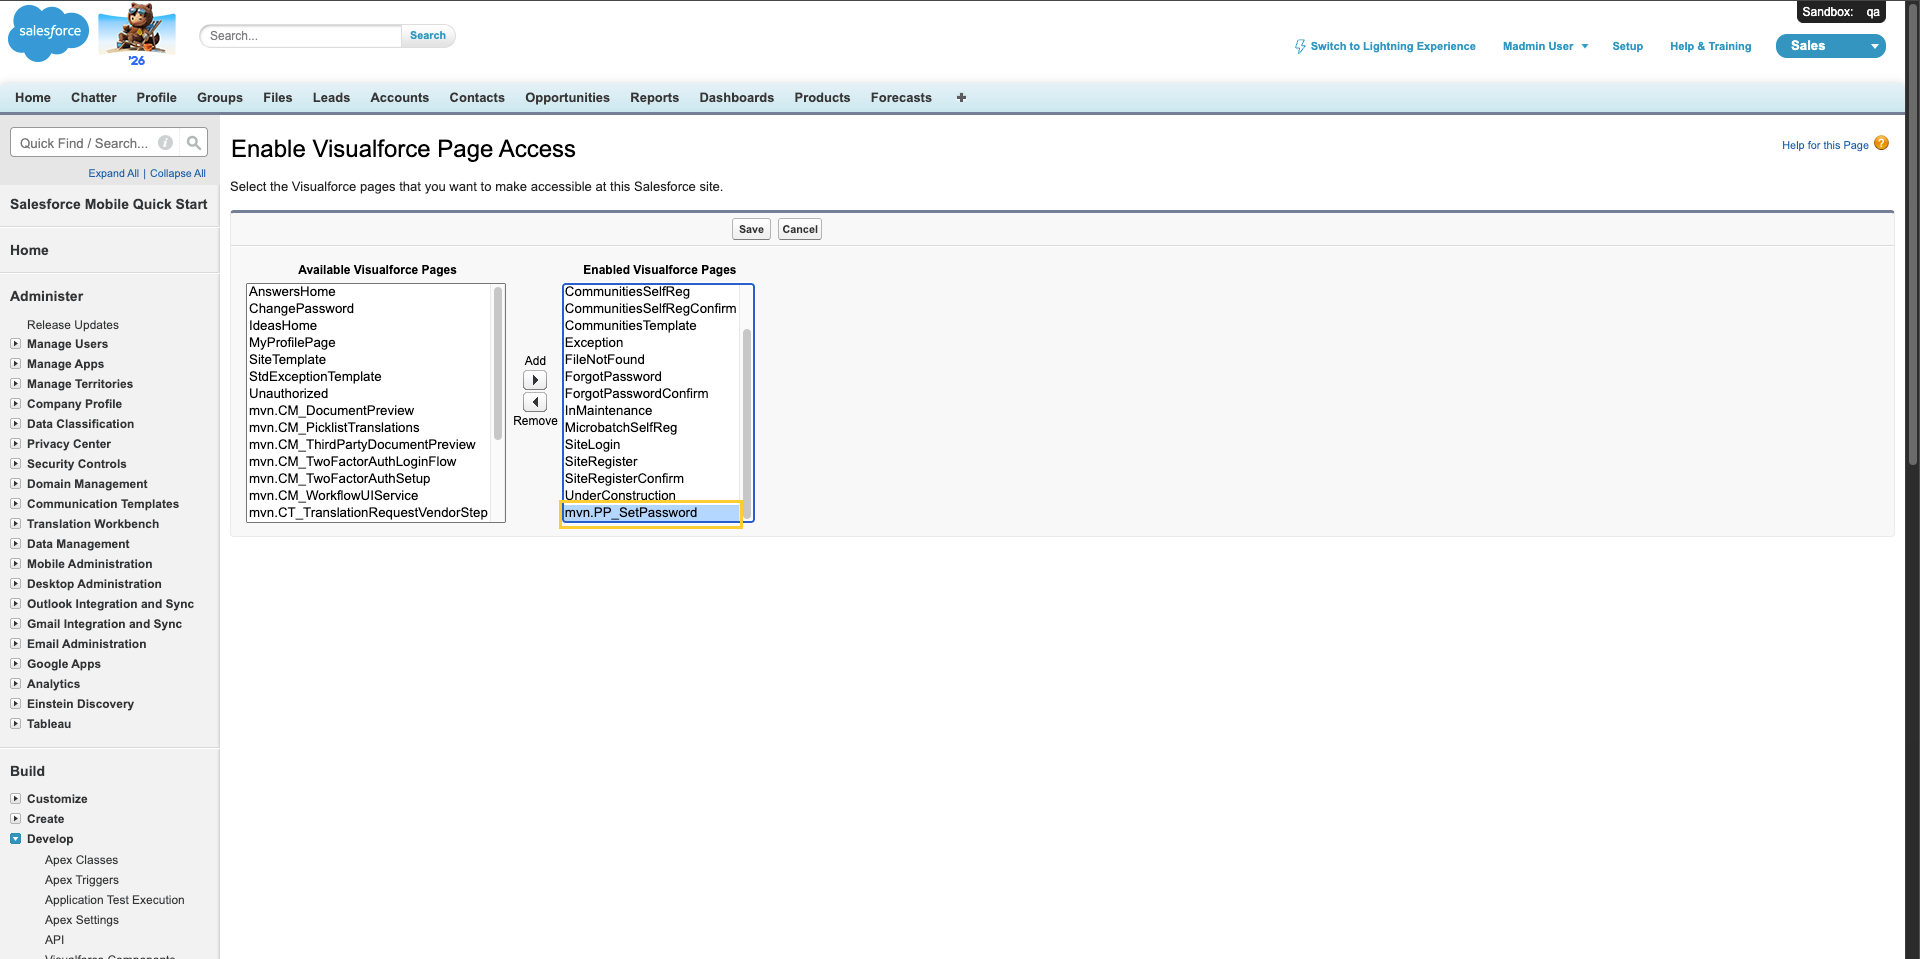
-
Save.
5. Guest user profile: Apex class access (and optional debug logging)
-
In Setup, go to Debug Logs → New.
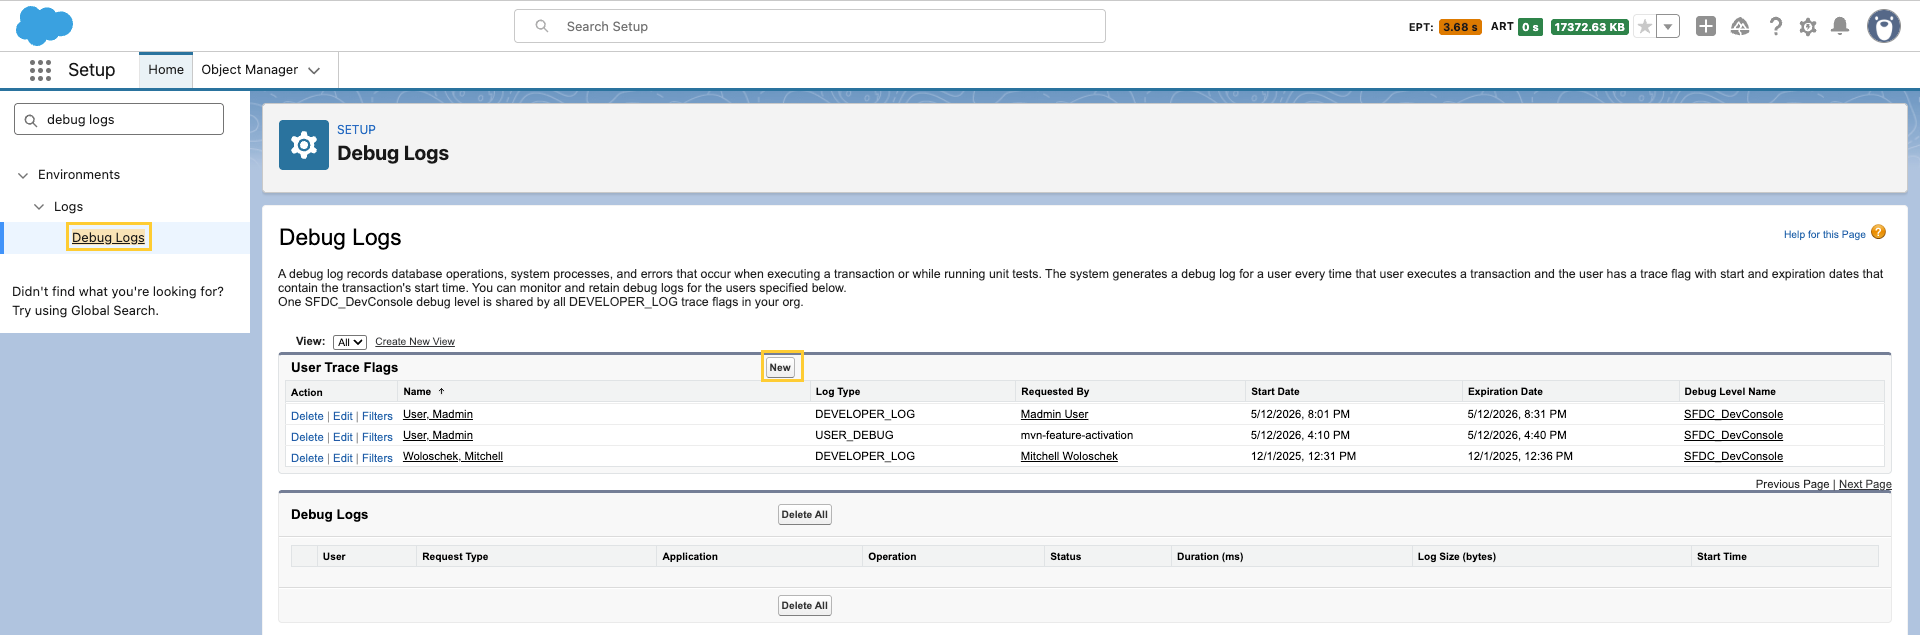
-
Configure the following settings:
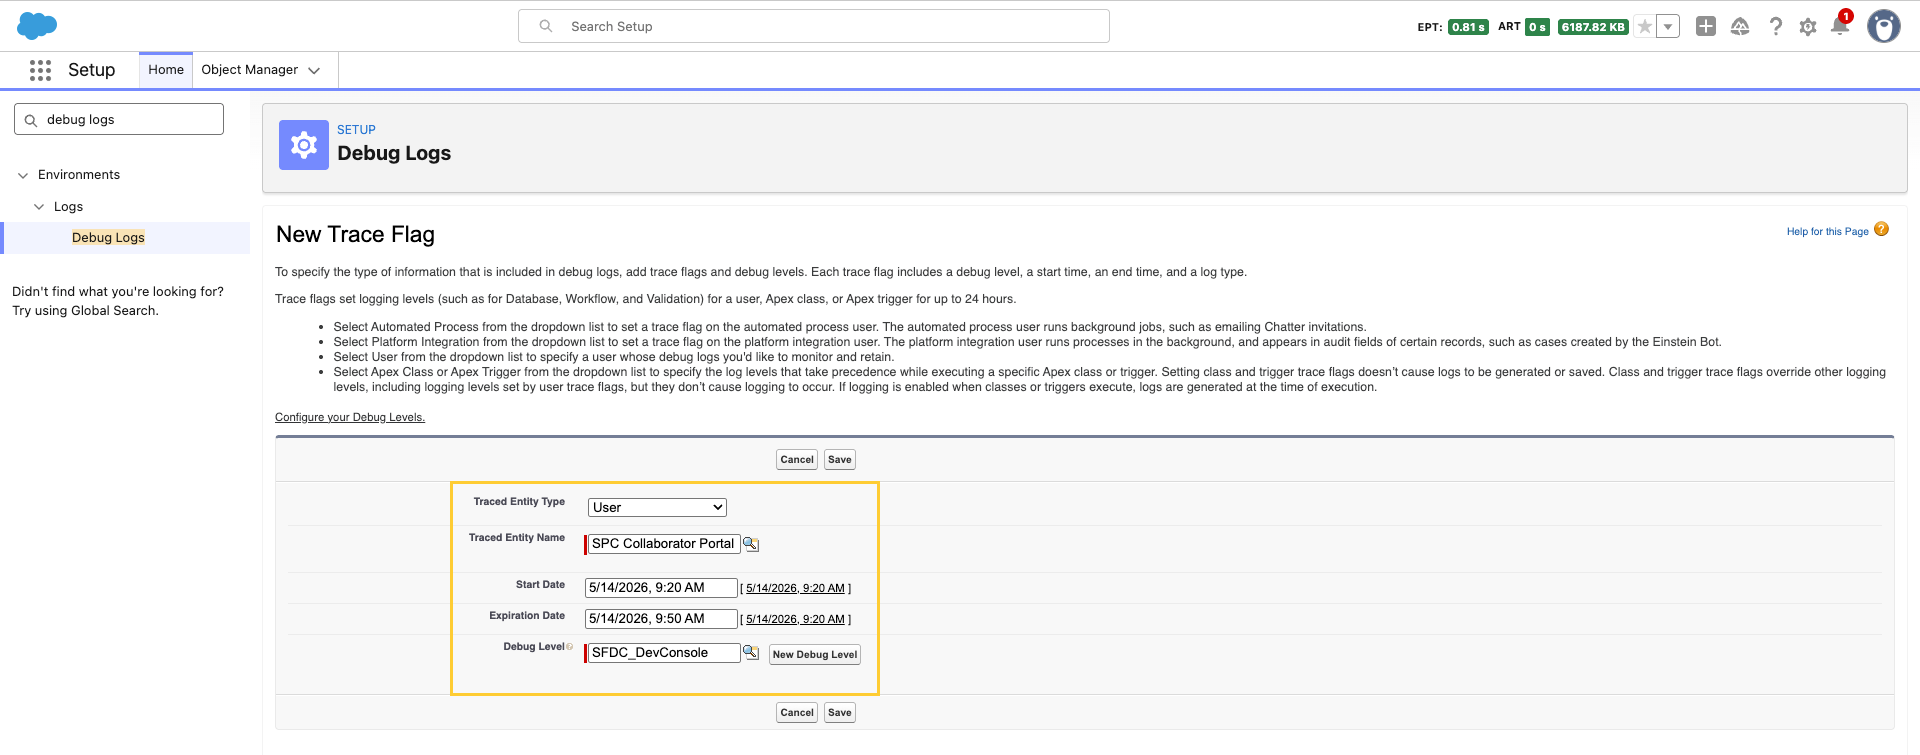
- Traced Entity Type: "User"
- Traced Entity Name: "SPC Collaborator Portal Site Guest User" (or the equivalent site guest user for your portal)
- Debug Level: Choose any
- Save
-
In the Debug Logs list (or from the user lookup), open the site guest user record (for example, the record with Name: Site Guest User, SPC Collaborator Portal).
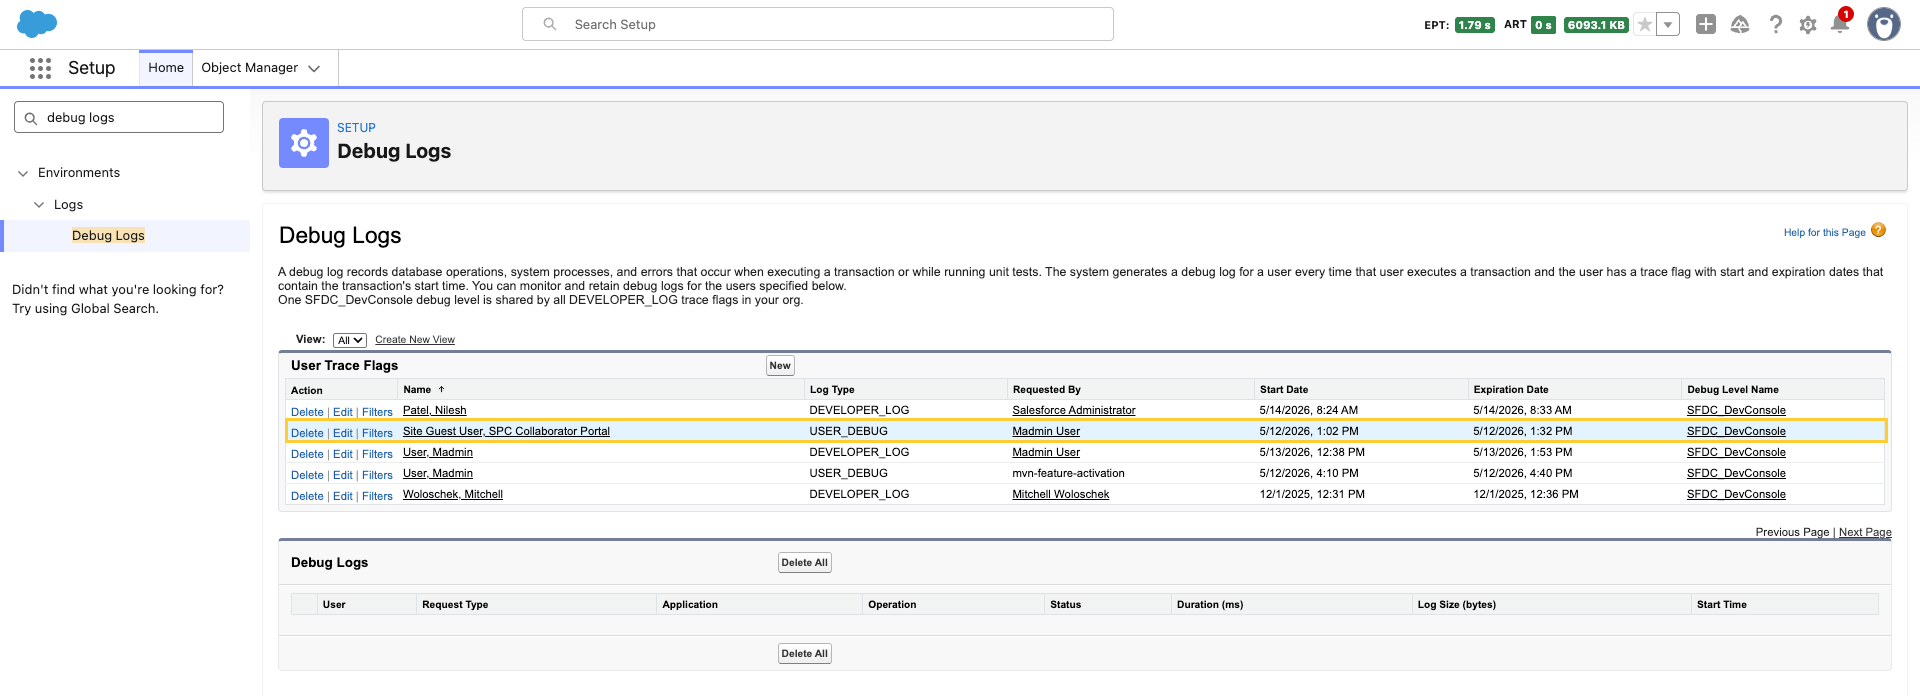
-
Open the Profile: SPC Collaborator Portal Profile assigned to that guest user.
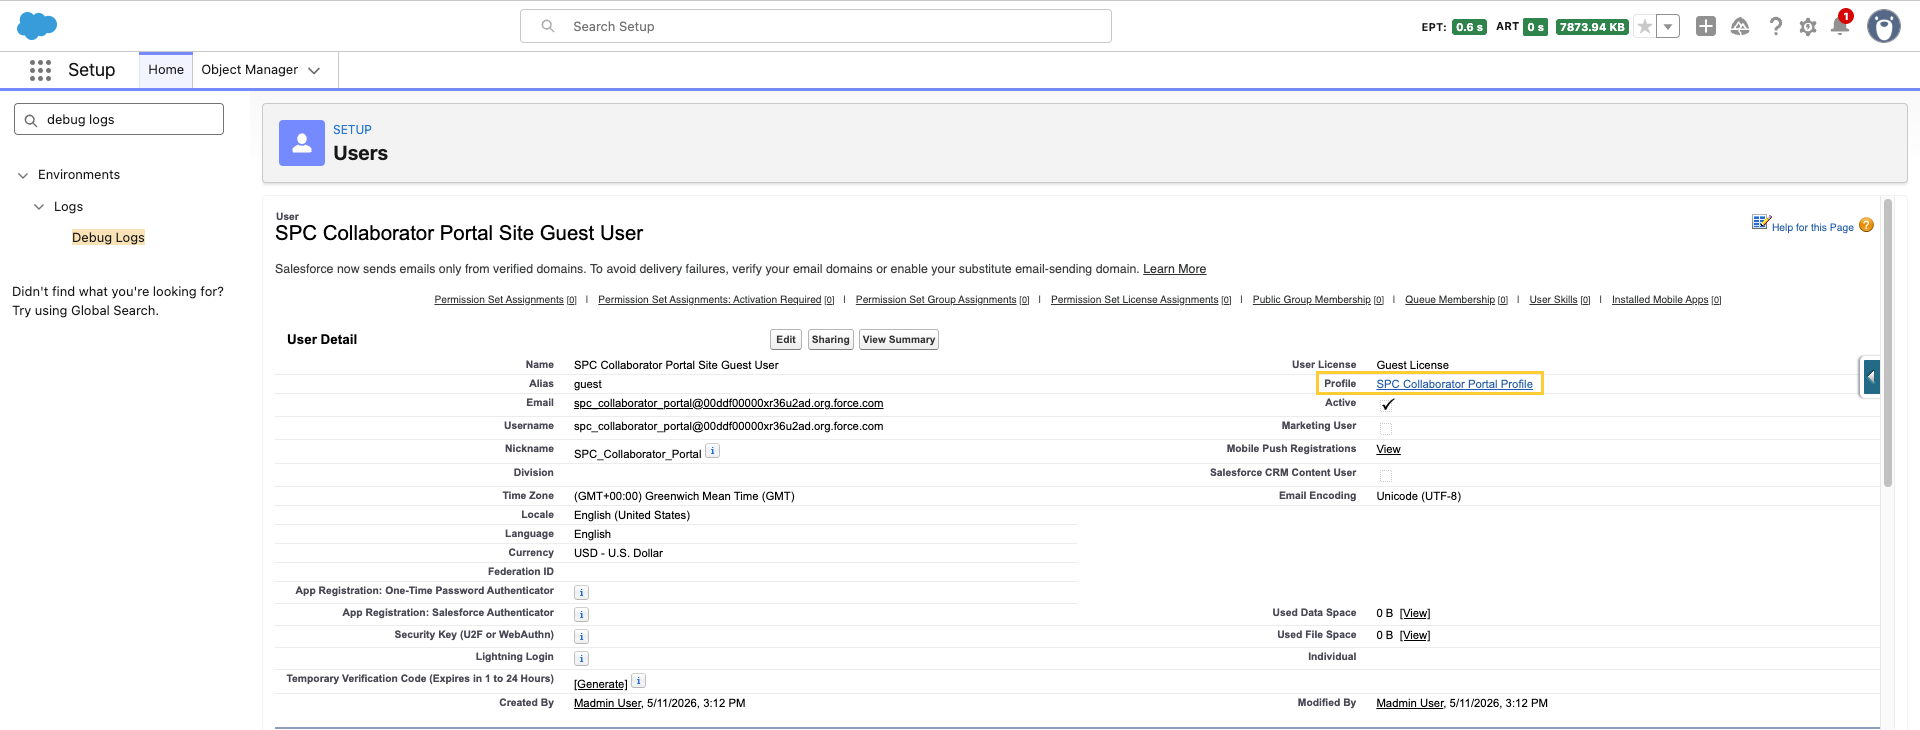
-
Under Enabled Apex Class Access, enable:
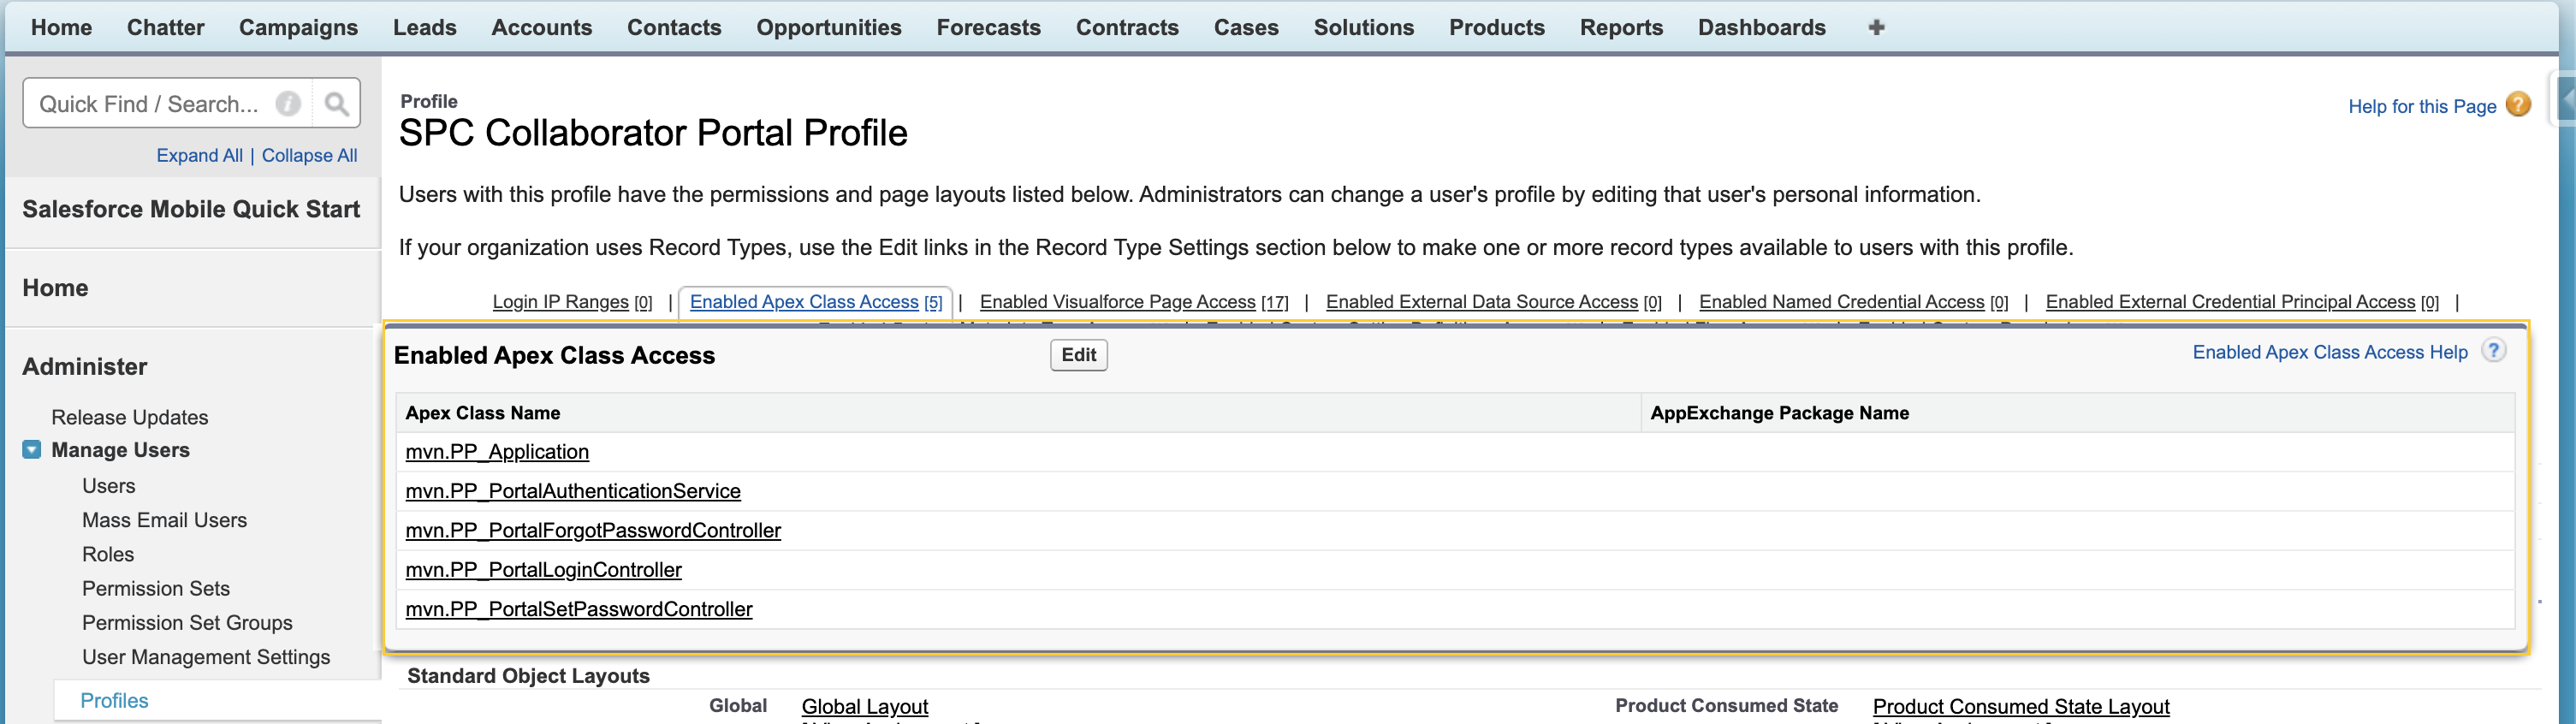
PP_PortalSetPasswordControllerPP_PortalForgotPasswordControllermvn.PP_PortalLoginControllerPP_ApplicationPP_PortalAuthenticationService
Remove or adjust the debug log when you are finished troubleshooting, if you no longer need tracing.
6. Login & Registration (after the portal is published)
-
In Setup, → All Sites, open Workspaces for the SPC Collaborator Portal.
-
Open Administration.
-
Navigate to Login & Registration and configure the following settings:
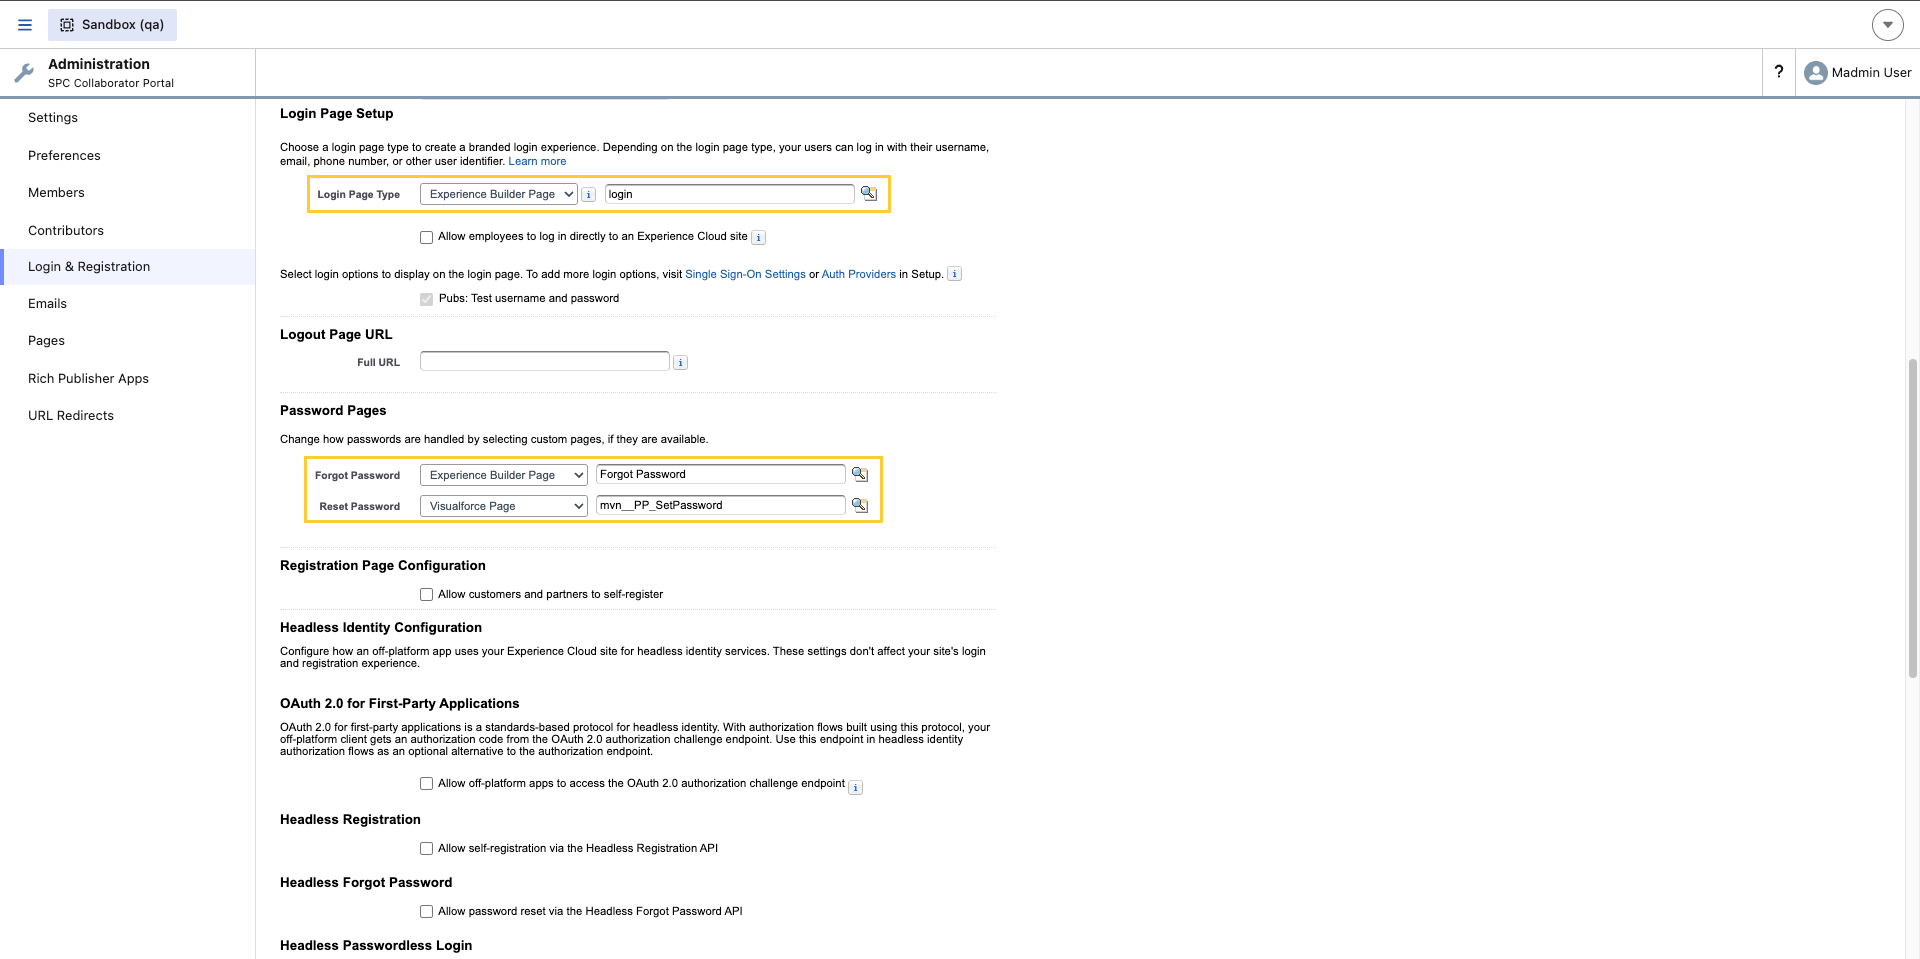
- Login Page Type: Experience Builder Page → login
- Forgot Password: Experience Builder Page → Forgot Password
- Reset Password: Visualforce Page →
PP_SetPassword - Save.
7. Verify end to end
In a sandbox (recommended):
-
Run the full forgot password flow and open the link from the email. Confirm that it loads the
PP_SetPasswordVisualforce experience. -
Confirm that any password requirements banner matches the org policy; when Salesforce surfaces policy text for your site.
-
Save the new password and confirm that the user can log in.
8. Configure URL path for the new portal
After verifying the new SPC Collaborator Portal works correctly, you need to decide how users will access it. Choose one of the following approaches based on your organization's needs:
Option A: Replace the old portal path (recommended for clean cutover)
If you're fully retiring the legacy portal, the simplest approach is to have the new portal take over the root path:
-
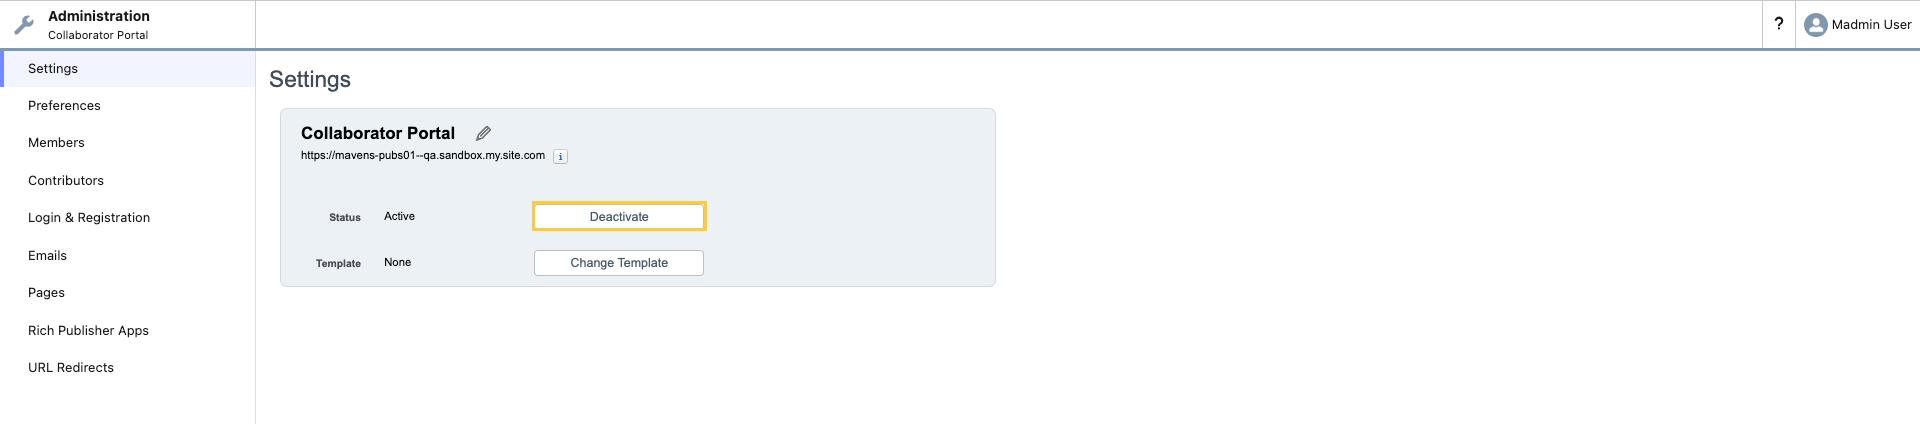
Deactivate the old portal:
-
In Setup, → All Sites, find your legacy portal (currently at
/) and open Workspaces.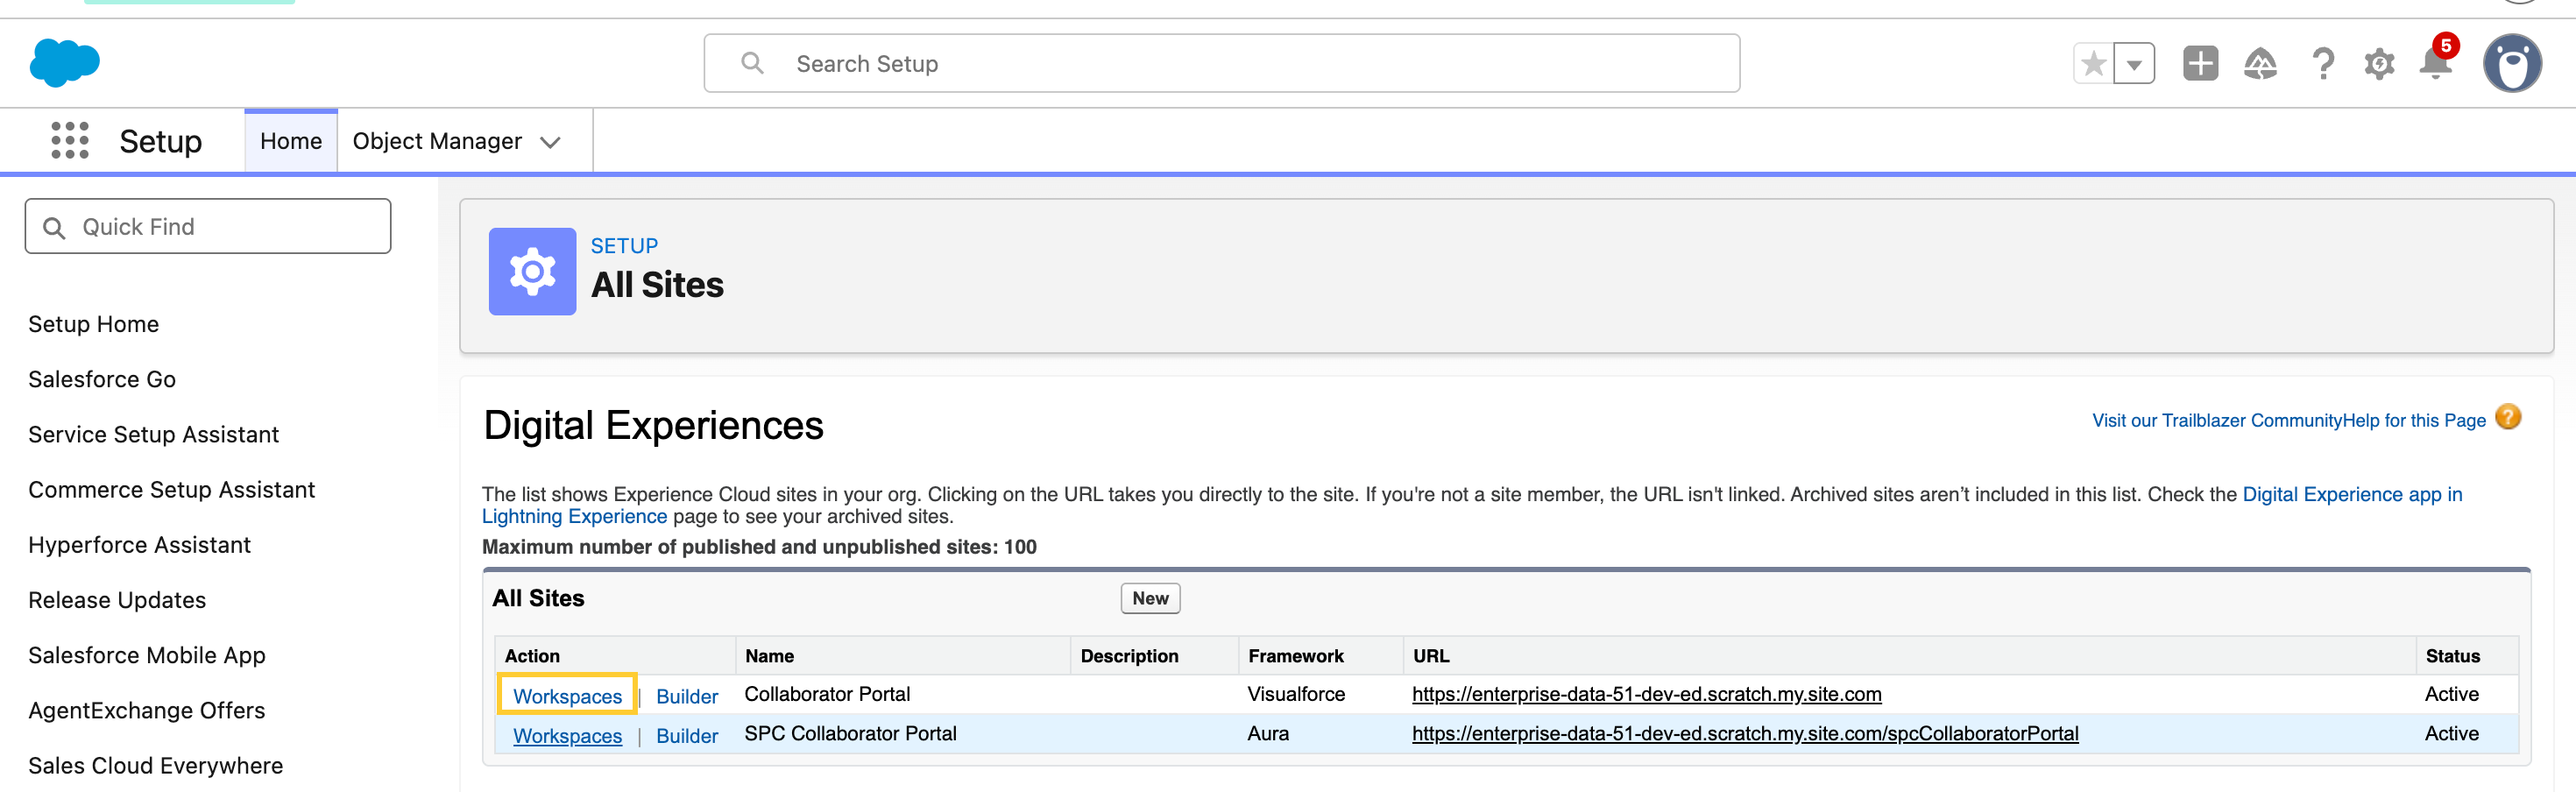
-
Open Administration.
-
Click Deactivate it make it Inactive.
-
-
Update the new portal's URL path:
-
In Setup, → All Sites, open Workspaces for the SPC Collaborator Portal.
-
Open Administration.
-
Navigate to Pages → Advanced Customizations and click Go to Force.com to open Site Details.
-
Navigate to Custom URLs. Click Edit next to the available custom URL. Change the Path from
spcto/(root).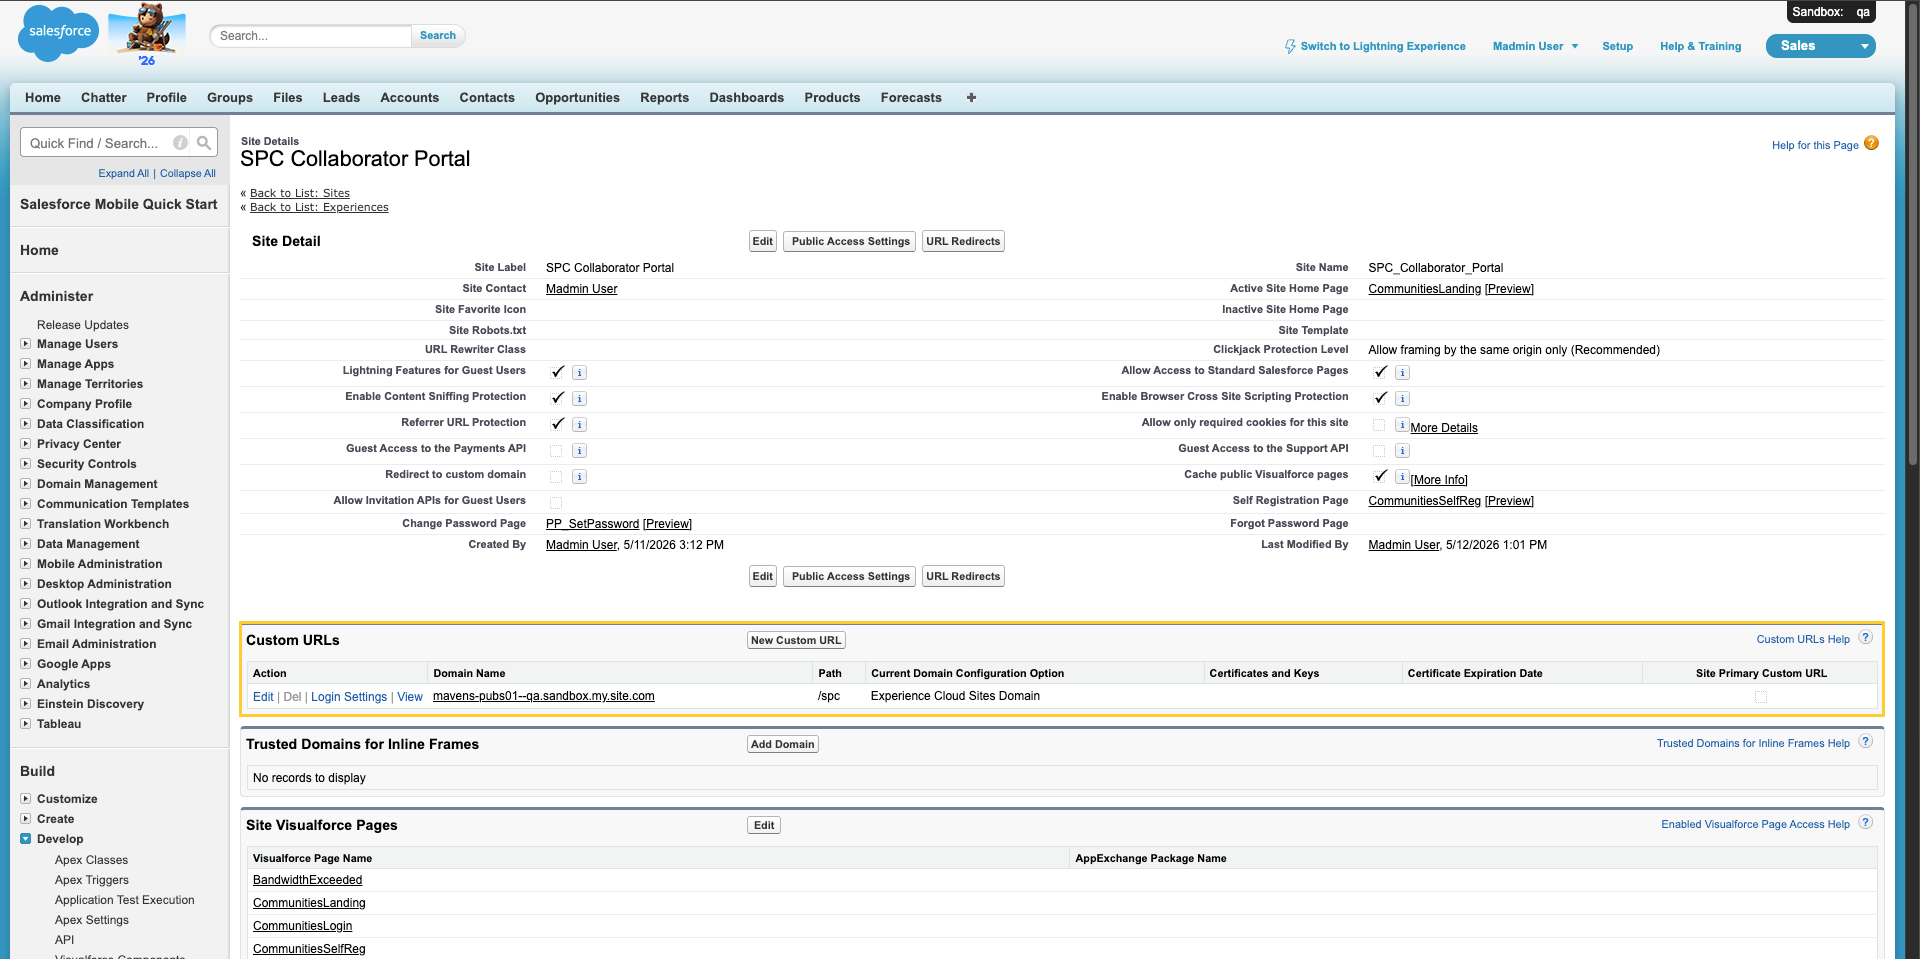
-
Save and re-publish the experience.
-
Users accessing your domain will now land directly on the new SPC portal without any redirects.
Option B: Add a redirect from the old portal to the new one
If you need to maintain the old portal URL temporarily (for bookmarks, communications already sent, etc.):
-
Create a redirect Visualforce page:
-
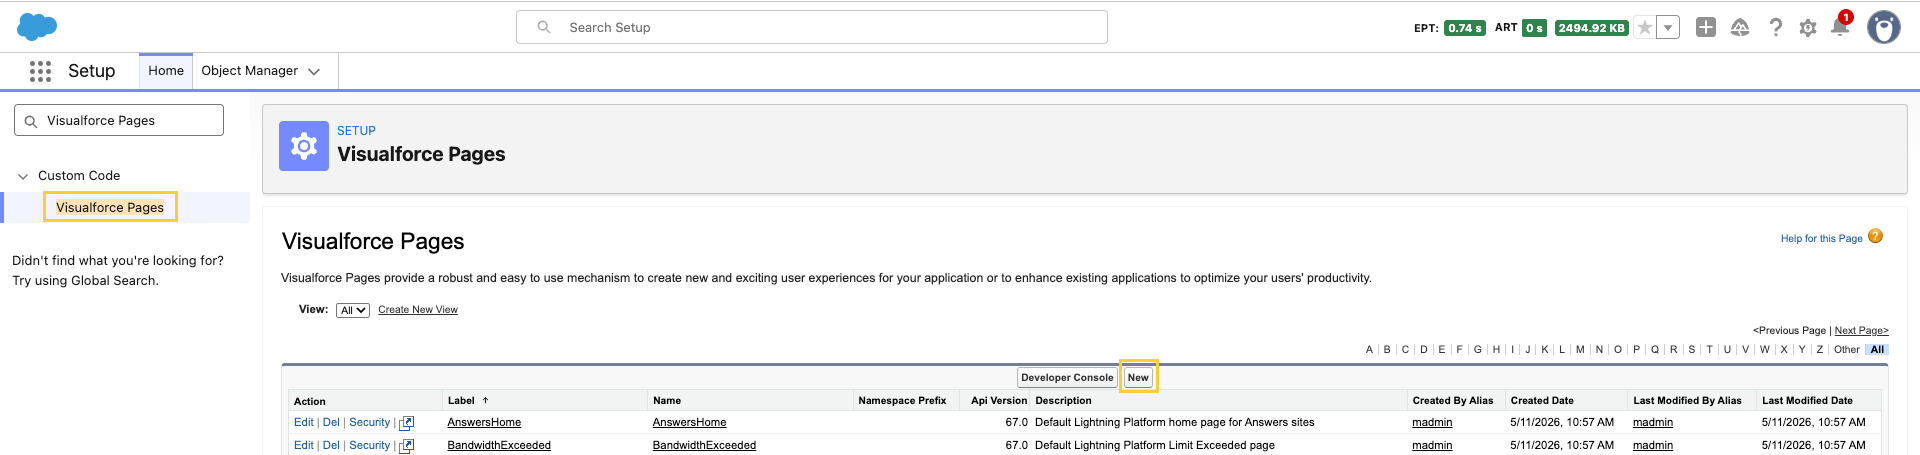
In Setup → Visualforce Pages, click New.
-
Configure the following:
-
Name:
RedirectToSPC -
In Visualforce Markup, paste the following code:
<apex:page showHeader="false" sidebar="false" standardStylesheets="false">
    <script>window.location.replace('/spc');</script>
    <meta http-equiv="refresh" content="0; url=/spc" />
    <noscript>
        <p>Redirecting to the new portal... <a href="/spc">Click here if you are not redirected automatically</a></p>
    </noscript>
</apex:page>
-
-
Save.
-
-
Configure the legacy site at
/to use the redirect page:-
In Setup, → All Sites, open Workspaces for the legacy Experience site whose path is
/(often the retiring Amplify-bridge site). -
Open Administration.
-
Navigate to Pages → Advanced Customizations and click Go to Force.com to open Site Details.
-
Set Active Site Home Page to
RedirectToSPCand Save.
-
-
Enable Visualforce access:
-
On the same Site Details page, open Public Access Settings

-
Navigate to Enabled Visualforce Page Access. Add
RedirectToSPCand Save.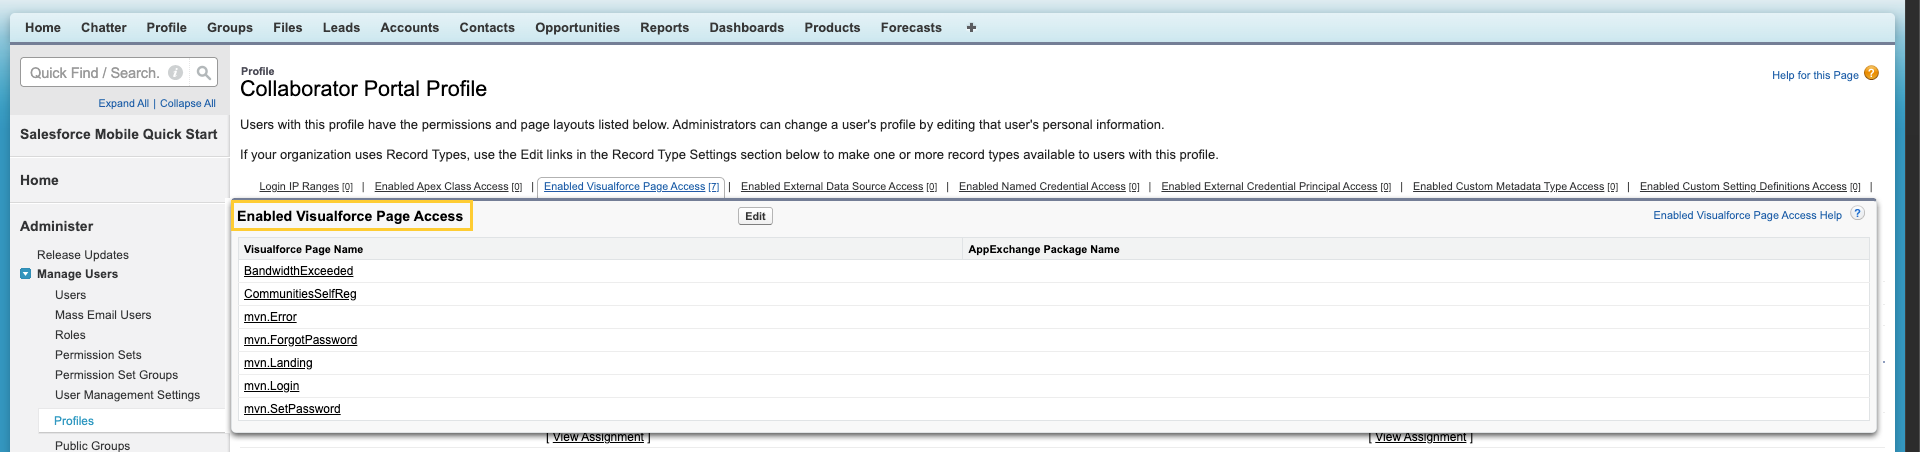
-
Now anyone accessing / will be automatically redirected to /spc.
Option C: Create your own custom domain in Salesforce
As part of this migration, Amplify will no longer host \*.pubs.komodohealth.com domains that redirect to your portal. You will need to create and manage your own custom domain.
-
Set up a custom domain in Salesforce:
-
In Setup → Custom URLs, click New Custom URL to create a custom domain.

-
Follow Salesforce's domain verification process (add DNS records and verify ownership).
-
Associate the domain with your SPC Collaborator Portal site.
-
-
Update DNS records:
-
Configure your DNS provider to point your custom domain to Salesforce.
-
Follow the specific DNS values provided during the Salesforce domain setup.
-
-
Update communications:
- Replace all references to your old
\*.pubs.komodohealth.comURL with your new custom domain.
- Replace all references to your old
Custom domains cannot be created in scratch orgs, but this functionality is available in production orgs and full sandboxes.
Option D: Amplify-managed redirect (transitional support)
During the migration period, Amplify can configure redirect rules from your existing \*.pubs.komodohealth.com domain to your new custom domain. This ensures a smooth transition for users with bookmarked links or saved URLs.